

… for a new project
 Tongan tapa is predominantly Broussonetia papyrifera or paper mulberry. It is the finest I’ve known, with the exception of a gauze-like piece of tapa from Fiji (left) that I saw at the recent Tapa Festival in Tahiti in November 2014 . For me as lace maker and tapa enthusiast, using this natural material is an ongoing challenge.
A friend brought me some unpainted tapa (feta’aki) from Tonga. I haven’t measured the cloth, but it is about 1.20 metres wide and many metres long. Length and width of individual strips depend on the size of the sapling that has been harvested for beating. It varies slightly.
 Tapa makers in Tonga layer and join those individual strips to make a larger piece for their final printed ngatu.
 Any holes and tears are patched by pasting small pieces of tapa over the area with starch.
 When holding up against the light and looking through such cloth, the doubled areas form quite a pattern – and tell a tale of the tapa’s quality perhaps…
My plan for a new project is to dye this paper mulberry tapa with fabric dye. I assume that the contact with the liquid dye will dissolve the starch and the joints and patches will come apart. I prefer to work with the individual layers and their ‘imperfection’ anyway. Luckily we have a rather deep shower tray, because my large plastic basin is too small to submerge the long feta’aki in enough water to soak it.
 As soon as the water penetrates the material I can already see that the pieces separate. After agitating the bark gently, because wet tapa has very little tensile strength and can easily be ripped, I can take out the separate lengths of bark. I gently squeeze them, roll them up in a thick towel and wring that towel-tapa sausage to get rid of as much water as I can before spreading the bark on a table to dry. I have covered our studio table with sheets.
 It’s a bit like detective work to discover how many larger and smaller pieces hide in such a squeezed-out ‘snake’.
 I find out that it’s usually two, sometimes three lengths that have most probably been beaten together. The bottom part of the bark is much thicker, the top usually very delicate and lacy. That’s why they are placed so that the bottom part of the one comes to ly on the top part of the other and thus give an even thickness.
 I have to find the beginning of one separate layer and pull or lift the piece and let gravity do its job.
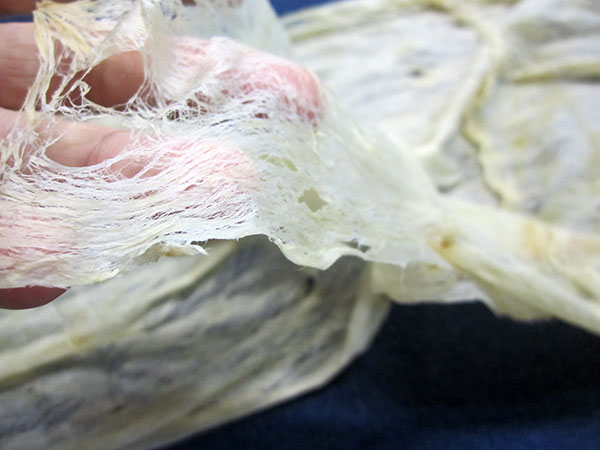 I love the contact with such, at this stage, very delicate material. I find that I have to respect its specific properties, if I want it to work for me and through handling it I get to know its strengths and weaknesses – and my own.
 Eventually all possible flat surfaces of my large studio are covered with fine tapa. Swimming in the bowl near the water’s surface are the fallen off patches. I skim them off, spread and flatten them, long and narrow, square and rectangular, hand-size and smaller, placing them in the spaces between the other longer strips. In my mind’s eye, the new work begins to grow. All I need now for the colouring is a day of sunshine which is required to develop the light-reactive dyes full brilliance.
 To be continued…

this is so beautiful Andrea thank you for sharing the details!
LikeLike
I’m happy, Mow, that you like it. I hope, you get some inspiration from my posts.
LikeLike
Fiona Hall made a series of very powerful paintings using huge sheets of bark cloth with earth pigments and plant dyes
http://www.roslynoxley9.com.au/artists/17/Fiona_Hall/1564/
a very powerful body of work I visited the show three times and cried every time
LikeLike
Thank you for this link, Mo. Indeed, very powerful works. I am sure they are even more effective in reality.
LikeLike