Tapa experiments in Tarascon

tapa experiments

article about tapa on AtiuIn September of 2017 the amazing book TAPA was launched in Paris. I was privileged to be one of the book’s many authors, and asked to write about the bark cloth on my former home island of Atiu (left). I was also invited to exhibit some of my works for the occasion (below a detail of my tapa-lace panel with Marquesan dance costumes in the background).

A. Eimke, lace panel, detailDuring the exhibition I met French artist and art restorer Marion Dumaine. Marion exhibited lengths of Tongan tapa beautifully decorated with natural pigments and gold leaf. Being both interested in barkcloth, the idea arose to meet in August 2018 and hold an experimental workshop. My German girlfriend Christel Weingart, felt artist, painter and published author, who had used barkcloth in a sculptural way many years ago, would also join us. Raymond and Colette Cristini offered us free of charge their lovely summer house in Tarascon sur Ariège (France) for our experiments. Summer house in Tarascon
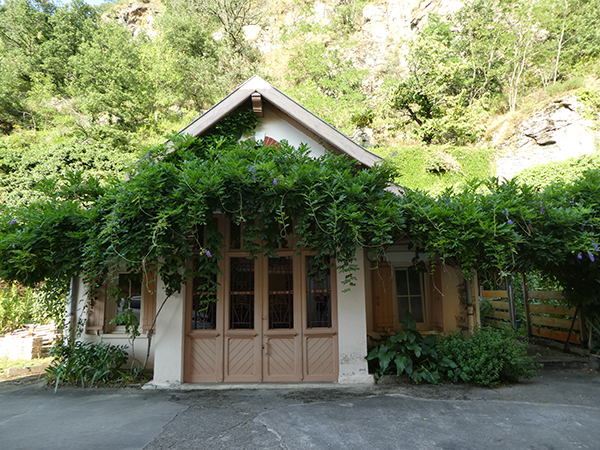
Our first interest was to check if there were any suitable plants growing in Europe whose inner bark could be successfully beaten into usable sheets. Marion’s cousin had had to cut down a fig tree, ficus carica, one of the many fig species and thus distantly related to the plant family from which tapa is being made in the South Pacific islands and other areas. They had kept some branches for us to explore.

Christel Weingart
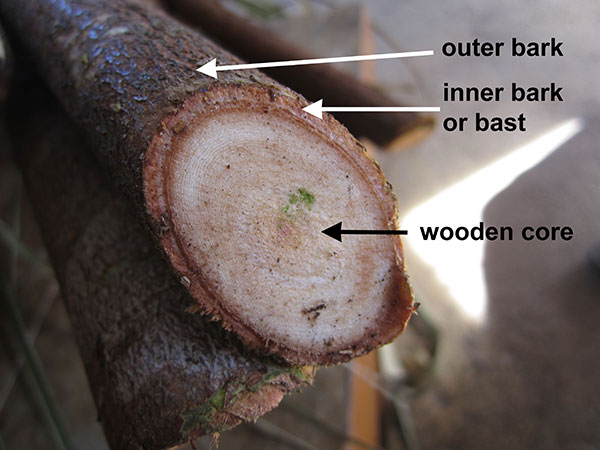
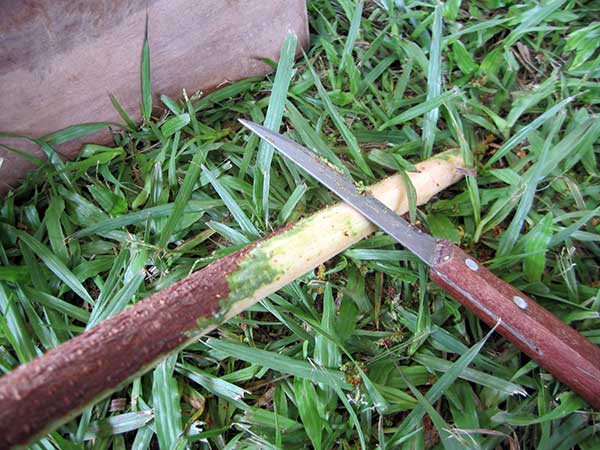
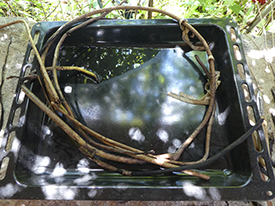
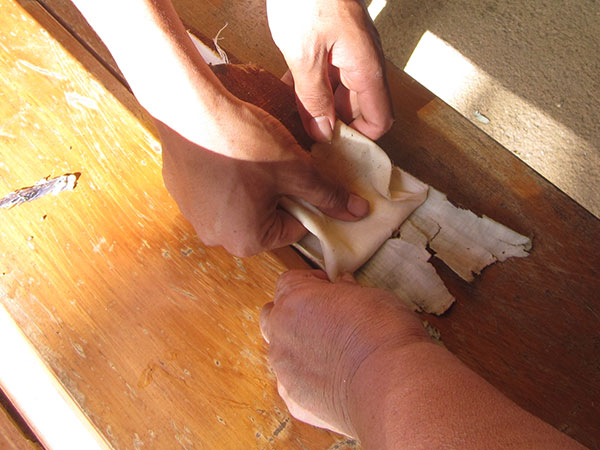
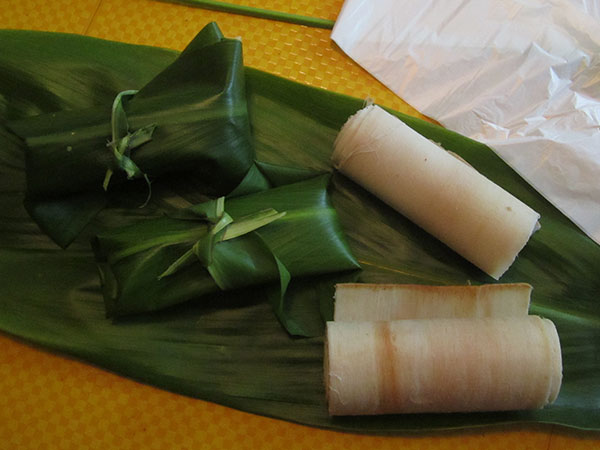
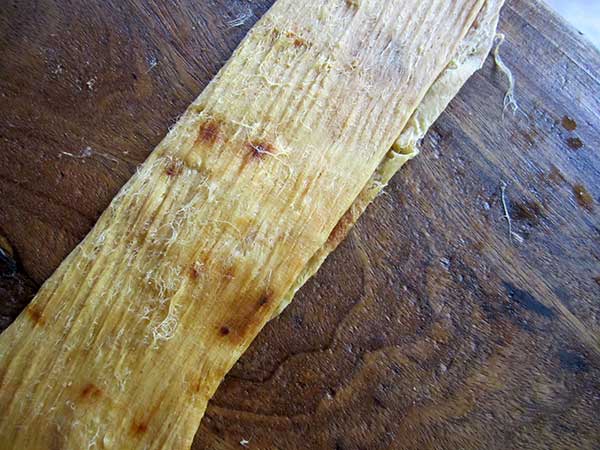
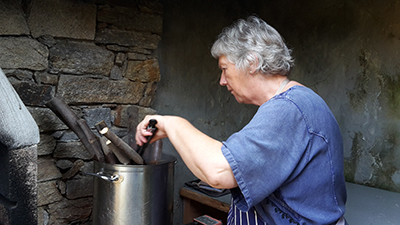
We boiled these in water for three hours (left: Christel checking on the branches) and spent an entire day shaving off the outer bark. The bast could be removed and smelled, felt and looked just like that of the Banyan roots I had worked with in the Cook Islands. We fermented it for a day, as I had done on Atiu, to make beating of the rather coarse bark easier.

Tangled fig fibres
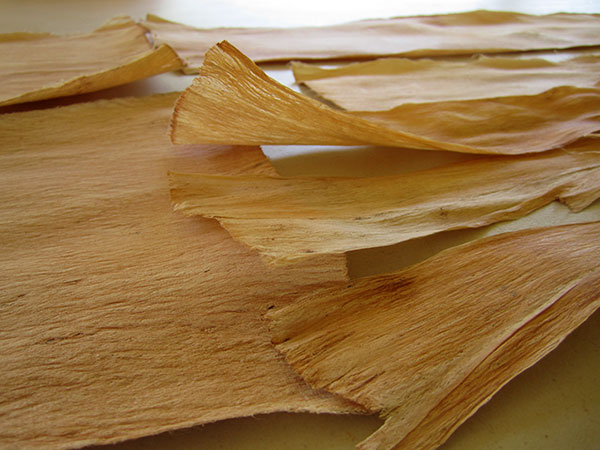
However when beating it, it did not stay in one piece, but dissolved into bundles of tangled fibres. So we learned our first lesson: not all fig bast is suitable for tapa making.


Philodendron rootsScraping Philodendron roots


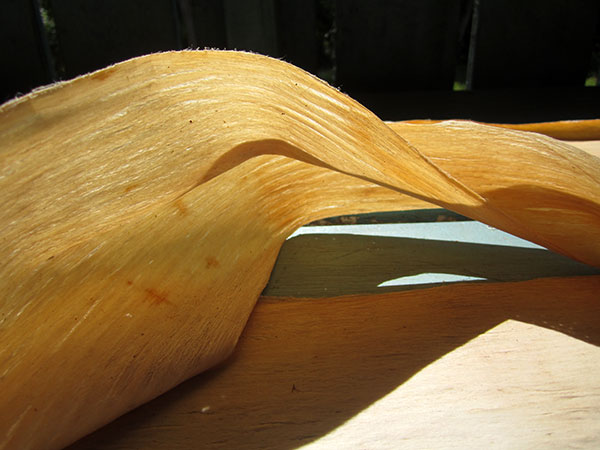
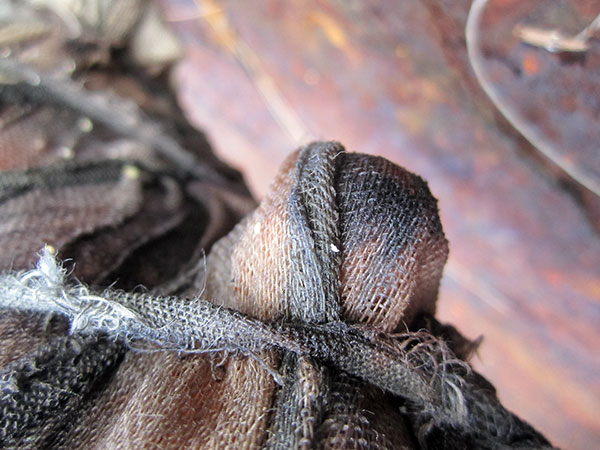
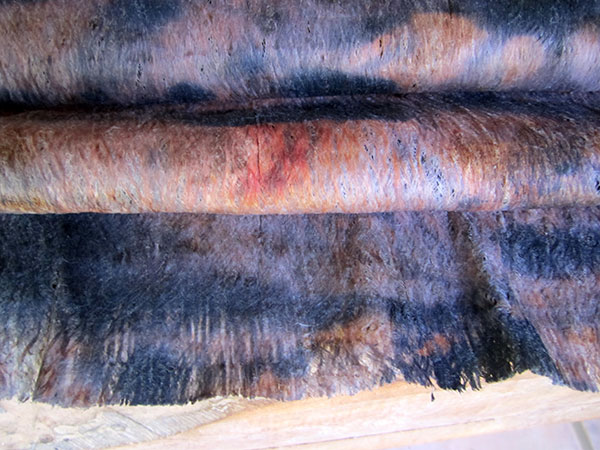
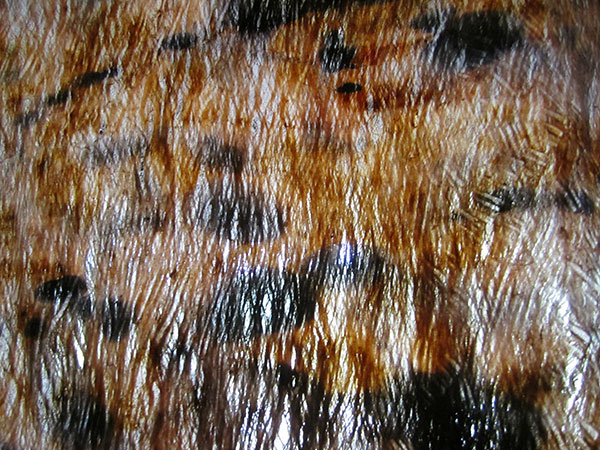
Marion brought some Philodendron roots from her giant plant at home to try out. It was a fiddly enterprise to shave off the outer bark. The best way of removing the inner wooden core was to just beat the root flat. When fresh, it had beautiful rusty and pink colours, however these dried into beige and brown once dry.

Pink and orange Philodendron rootCyan-dyed tapa strips
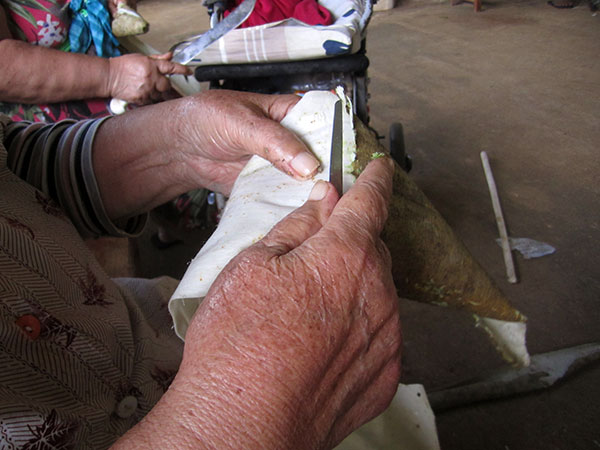
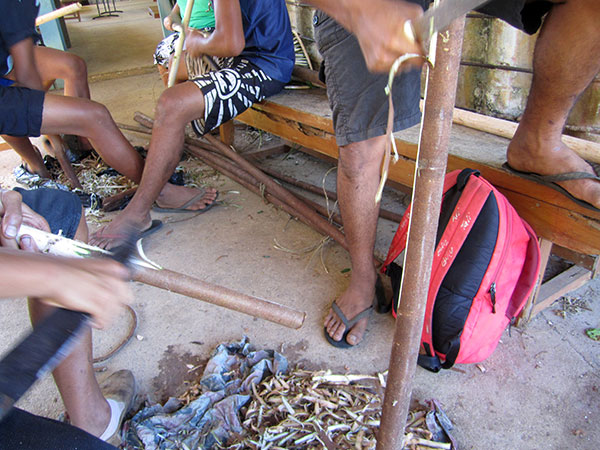
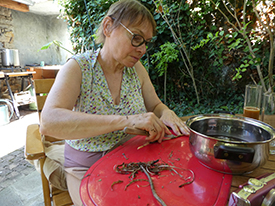
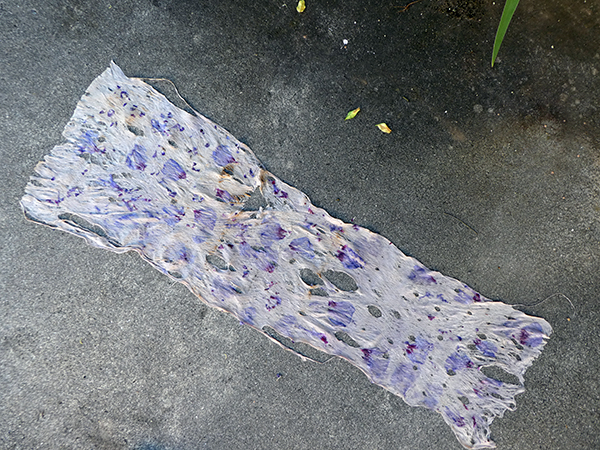
I took some blueprinted tapa with me which I wanted to felt into a freshly beaten length of tapa. Colette, our hostess, had brought us bundles of dried Broussonetia papyrifera (Paper Mulberry) bark from her home island of Futuna. We were grateful that Michel Charleux, the editor of the TAPA book, let us have the Marquesan-style anvil which had served for tapa demonstrations during the Paris book launch exhibition. Once the bast was beaten thin, I removed some slivers from the cyan-dyed tapa pieces and beat them into the white tapa. It worked wonderfully.

Hibiscus petalsHibiscus petals felted


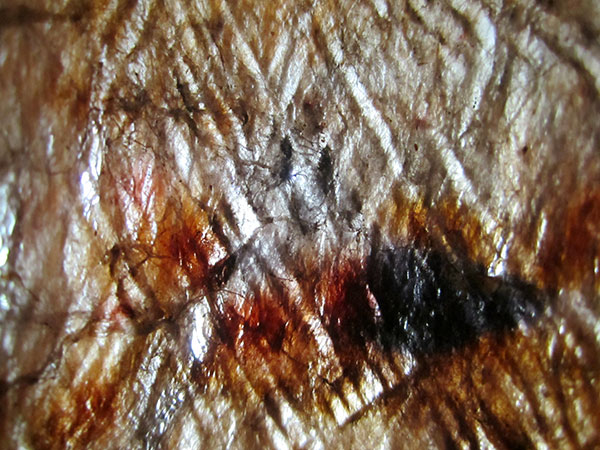
Encouraged by Marion’s experiments with the Philodendron roots, I decided to experiment with mauve coloured Rose of Sharon petals. The delicate upper parts were easy to felt into the bast, the thicker maroon centers not so well. However in the end, most of the petals had merged with the bark.

Tapa with Rose of Sharon petals

Lacy tapa
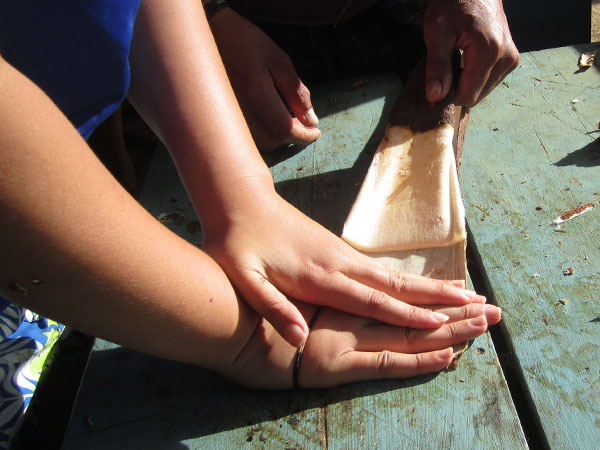
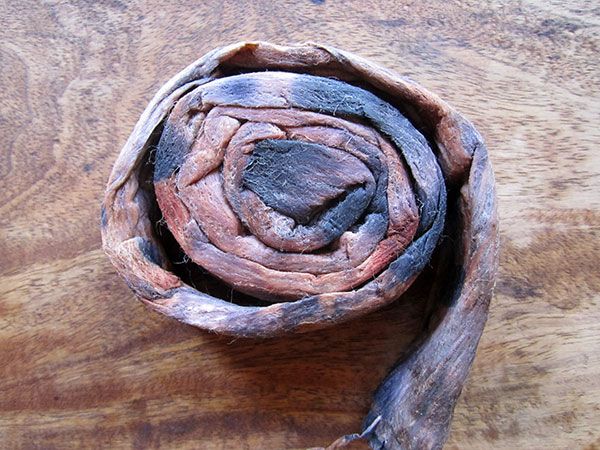
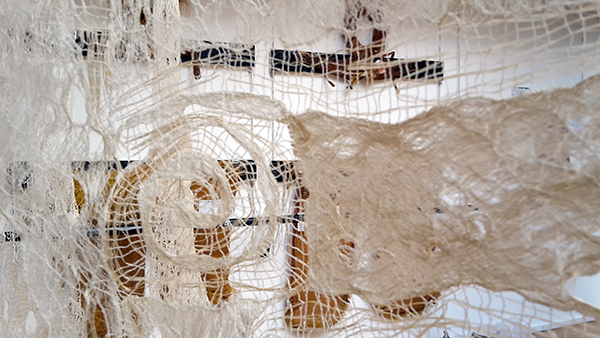
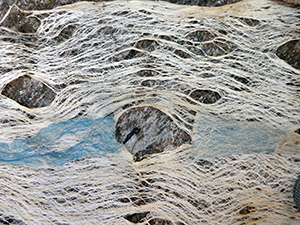
We decided to beat all strips of bark which we had already soaked in water. Both Marion and I were interested in achieving a lacy effect (left) for use in future artworks .

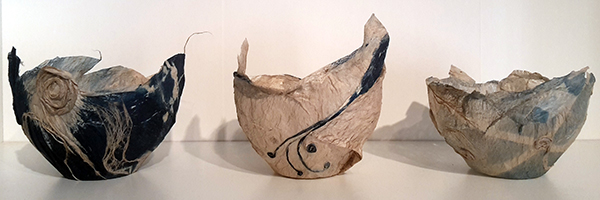
Meanwhile Christel had been using pieces of tapa to fashion some delightful three dimensional artifacts. I had seen Christel’s tapa bowls when I first met her in 2003 and had been keen to learn from her how to make them.

tapa bowl in progresstapa bowl with fig fibres


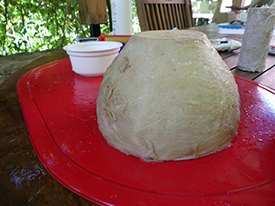
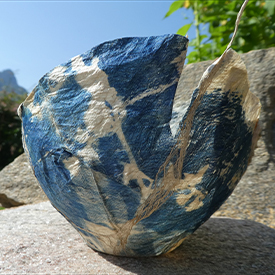
Over a ceramic bowl, with the help of cling film, water and cellulose glue she formed delicate vessels (left), decorated with spirals and some of the fig bast fibres from our previous experiment (right). They were especially impressive when seen in their delicate beauty against the light and blue sky of Tarascon’s summer.Christel Weingart, tapa bowlThis was my chance and now I knew what I wanted to do with the cyan-dyed tapa pieces.

leftoversAndrea - first bowl


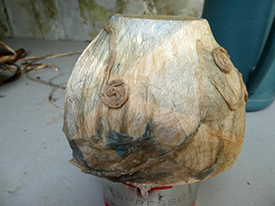
The blue and white patterns reminded of Delftware. After the first bowl I became more adventurous. I discovered that the pieces were double-layered and that using both layers made the bowl too opaque for what I wanted to achieve. I also used the inner, plain layer and adorned it with the remnants of the previous bowl. Blue bowl - work in progress Blue bowl - dry


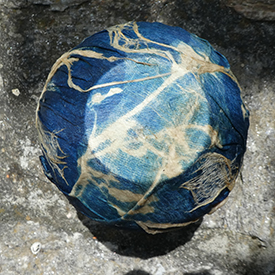
Now, back in Terrassa, the three bowls I made in this enjoyable experimental workshop adorn my book shelf. They may become part of an exhibition I am hoping to have some day… Andrea Eimke - three tapa vessels


Making Anga…

Sunlit barkcloth

… from scratch

From questions following my earlier post I can see that there is a need to explain how we on Atiu make anga (the Cook Islands word for barkcloth or – as it is commonly known – tapa). Thanks to the taunga (experts) of our island and the teacher and senior art students of Enuamanu School, during a special workshop in 2013 I was able to shoot these detailed photographs that now help me to illustrate the process.

Cutting banyan aerial rootsOn Atiu, paper mulberry (Broussonetia papyrifera, which our people call aute) is nearly extinct. Our people use the inner bark, also called bast, of the aerial roots of the banyan (ficus prolixa, on Atiu called ava), stems and branches of breadfruit (artocarpus altilis, CI Maori kuru), and dye-fig (fictus tinctoria, on Atiu mati) instead. Since banyan and dye fig trees grow wild on the island’s raised fossilized coral reef, harvesting is not an easy task.

Banyan root cross-sectionIn this cross-cut of a banyan root we can clearly distinguish the white wooden core and the thick layer of bast that sits under the thin outer bark. It is the bast that gets beaten. Raw banyan bark cannot just be pried off the wooden core like most other barks can. The roots therefore need special preparation.

Boiling banyan rootsThe most common way, if you only need short pieces of bark, is to boil the sticks in water. The heat eventually shrinks the bark away from the wood and thus makes it easy to get it off . Longer roots can be carefully heated on an open fire, or steemed in an earth oven to achieve that same effect.


Cutting dye fig barkThe bark of the stem/branch/root is cut lengthwise to peel off the bark. In the photograph we see dye fig specimens.


Separate outer and inner barkDifferent methods are used according to plant species and country. Sometimes, the entire bark is removed, a horizontal slit is cut across the outer bark, which is then carefully peeled loose…

Peeling off outer bark…before it can be torn off the inner bark, much like skinning an animal.


Helping to peel off barkThis is best done with someone else’s help and requires strength and skill.


Shaving off bark with a bushknifeWhen I worked with a small sample of rubber tree aerial root during the Marquesan tapa artist Sarah Vaki’s workshop at the 2014 Tahiti Tapa Festival, I was shown not to cut off the outer bark, as the Atiu boys do…


Scraping off bark…but to carefully scrape it off until all the green matter is gone and the white bast is revealed. The more bast there is, the wider my finished cloth can be.


Loosening the barkSarah used a clever tool, a stick of guava wood, which is very hard, with a diagonally cut end. This helped me to pry off the bark. It looks so easy when experts do it, but I had to be very careful not to damage the bark in the process.


Bark ready for storageThe bast is washed, kept moist and can then be processed further. For storage, it is rolled up inside out, wrapped in ti leaves (cordiline terminalis) or banana leaves and, gathered in a plastic bag, it keeps well in the freezer until it is needed. In less humid climates or places with air condition, if can also be dried for storage.


Initial beating of barkThe fresh bark can be beaten directly. On Atiu we use square hardwood beaters, called ike, which have four different sides with length-wise incisions. The side with the widest ridges is used for the first breaking open of the fibres and softening of the bark. As the bark grows, the sides with the narrower incisions are used and the beating becomes gentler to insure that the resulting cloth gets a smooth and even surface.


Dried bark clothOnce the bark has been beaten evenly throughout and has reached its largest possible with, it is spread out flat to dry. Exposing it to the sun will darken and harden the bark. That’s why I prefer it to gradually dry in the shade. It is important to keep finished tapa dry so that it doesn’t get mouldy, so airing it from time to time is a good idea.

For special projects and a much smoother bark to work with, it is necessary to go through some more preparation before the beating process can begin. I will write about this my next post.

Tapa and rust (6)

Tapa and gauze

I have brought a new piece of Banyan bark, this time only just beaten to become flexible enough to wrap it around the magic frame. Like the previous piece, as soon as I wrap the bark around the metal, the blackening process begins. I love that magic!

Tapa and gauze - close-upI have also wrapped a piece of eucalyptus-dyed gauze on the outside, part of which just sits on the metal, the other part covering the tapa. I want to find out, whether the area that covers the tapa will be dyed a different colour, i.e. whether the tapa’s own ‘juice’ leaves a trace.

Knobbly frame wrapped with tapa and gauzeThe weather is not so wonderful and I’m in a hurry, so I just drive to the beach and bring the frame back to unwrap at home. What I find is quite photogenic.

Tapa and gauze brown and grayDry tapa and gauze close-upYes, the tapa has added some brown colour to my gauze. Where it has just touched the metal it is only a mottled gray.

Sculptural tapaThe dried bark keeps its shape as I carefully peel it off the frame. I should leave it as is and use it as a sculptural piece…

Beating the tapa againHowever, my intention is to soak the dried bark and beat it until it is as thin as possible. I’m glad we live way outside the village, because it is a Sunday morning when I sit down to do that. I just hope the lovely sound of my tutunga (wooden anvil) will not be heard in church…

Folded wet tapaTapa SpiralTapa fibres and ikeTapa finished beating I fold the strip lengthwise and beat it, beat it, beat it, unfold and refold it and keep beating some more until I run the risk of ripping it with the next beats. Only then am I satisfied.

Tapa thin enough to see thruIn its wet state, the tapa’s colours are rich; they will fade a bit as the bark dries.

Tapa with beater marksThe material is thin and see through. One can clearly see the marks the ridges of the ike (beater) have left behind. I had hoped that I could perhaps beat tapa and gauze together, but that hasn’t worked out. I feel tempted now to experiment some more with gauze…

Tapa and rust (4)

Frozen banyan bast

I have taken a piece of banyan tapa out of the freezer to thaw. It was harvested and wrapped in ti leaves (Cordiline terminalis) when we did the tapa making workshop with the senior art students at Enuamanu School a year ago. Keeping some samples of bark was my ‘payment’ for filming the event. I have never frozen fresh bark and am all curious how the bark feels to the touch and how it will be to beat it.

Beaten banyan bastFreshly harvested bark is tough at first. I can see from the discolorations that it must be a piece that has been buried in the sea during last year’s experiments. I notice with the first beats that this bark is beautifully soft and requires much less strength to “crack open”, i.e. loosen the fibres. It means I got to be careful not to beat too hard so as not to produce holes right away. My intention is just to beat it a little bit and then take it down to Ava Tapu beach to affix it to a part of the Edna. Having this amazingly soft piece of banyan on my tutunga (wooden anvil) carries me away and I go on until it is nearly finished.

Beating folded banyan bastI try out a new technique of folding the bark length-wise so that I end up with beating a parcel of fibres. I would love to beat it thinner, but stop right here. I might moisten it again and beat it some more after it has been in contact with Edna.

Tapa project Enuamanu School 2013It amazes me to return the bark to this same beach under whose coral boulders it had been buried last year. Little idea did I have then of the journey this tapa would undertake. Bringing it back to the Edna now is only the beginning of a new phase…

Uncovered rusty frameWe have just uncovered the “wash-away frame”. It will be a wonderful piece of the Edna to do its magic with this tapa piece. I wrap my “don’t remove tape” around the frame as well to secure the tapa as best I can.

Tapa already black

Tapa-wrapped frame hung high

I can’t believe my eyes when the colouration is almost instant at the contact with the salt-water-soaked tapa. This time I place it high up on Edna’s bow, wedging it into a hole and hoping that the sea won’t steal it. Will it be there tomorrow? What will it look like then?

Tapa and Rust (3)

Banyan on rusty rod

A rainy day in between prevents me from returning after 24 hours and gives my experiment some more time to show results.

Wow! I have not expected such amazing confirmation of my theory that the reaction of tannin with the iron oxide, which is possibly contained in Banyan barkcloth, will produce black discolouration.

Spotted Banyan tapaNot only am I rewarded with deep black rust stains, even a pattern has formed where the strings have pressed the bark firmly against Edna’s magic rusty rod. This now makes me wonder what would happen, if I wound a freshly beaten strip around the magic rod? I still have some unbeaten bark in the freezer which I will use for that next experiment. How exciting! Watch this space…