Cyanotypie – a workshop

Paulo Cacais at Tigomigo Gallery

In June 2018 I enrolled in a workshop at Terrassa’s wonderful art gallery Tigomigo. Its owner Paulo Cacais introduced us to the secrets of cyanotypie.

Cyanotypie is a photographic process that results in cyan or Prussian blue prints. It was invented in 1842 by Sir John Herschel. British botanist Anna Atkins used it immediately in a series of botanical books published in 1843. She can thus be considered the first (female) photographer. Blueprints were widely used for many decades in architectural offices until alternative methods were invented in 1942 . Artists still use it today.
Blueprint works of R. Eretz and L. Elkivity

During my visit to Tel Aviv at the end of 2017, I was fortunate to meet the artists Rachel Eretz and Lucy Elkivity in their studio and admire their co-operative blueprint works (left). The technique resembles the sun-dyed pareu we used to make in the Cook Islands. I became curious to find out if I could use this method on tapa.

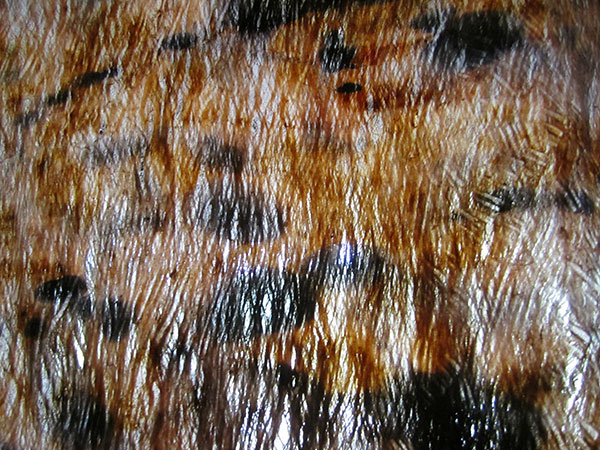
I took some pieces of Tongan tapa with me to the workshop. In his dark room, Paulo showed us how to dissolve small amounts of potassium ferricyanide and ferric ammonium citrate in warm distilled water and apply the greenish solution with a brush to the surface of our substrates. The prepared pieces were then left in a dark place to dry.

Circles and gauze
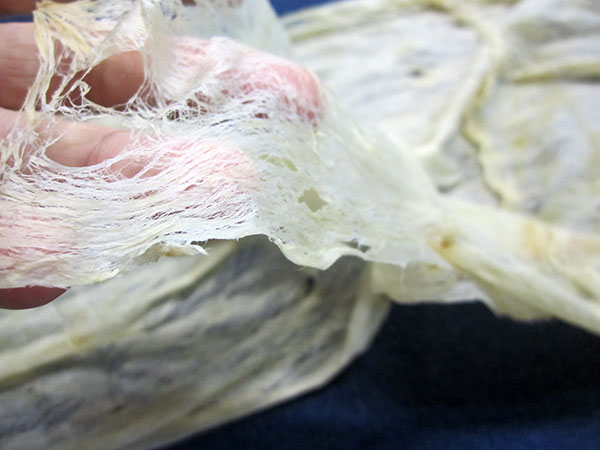
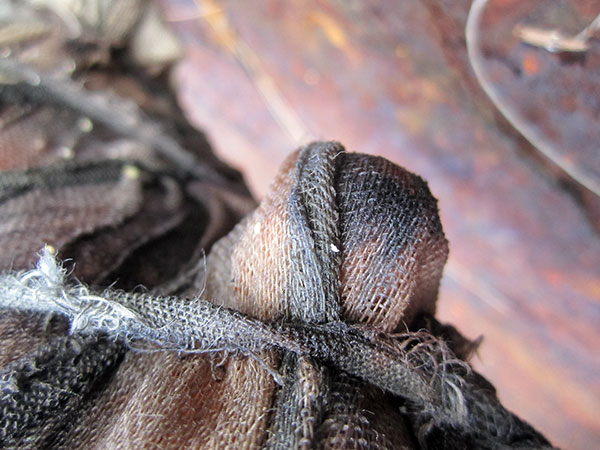
My first idea with embroidery frames and gauze fabric did not give good results, since it had to be kept inside so the wind would not blow it away and could thus only be developed through the window.

weeds as print material

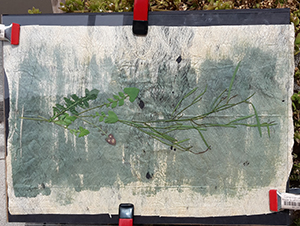
On a supporting frame, under glass plates held in place with clips I could then arrange my printing material on the dried substrates. I opted for plant material which I found outside the gallery.


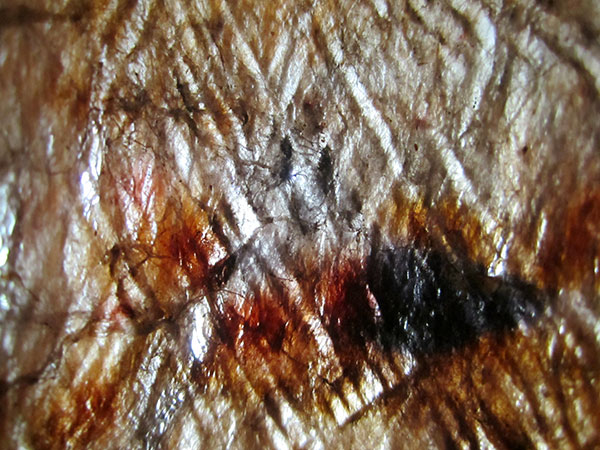
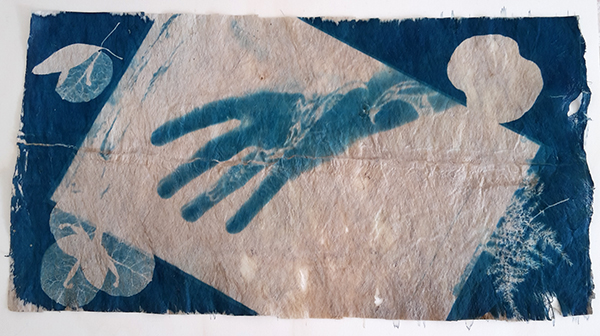
Paulo had the great idea to scan my hand, print it out on transparent paper and use it as a “negative” that the sun could develop. It is amazing how quickly the colour of the chemicals turns from a light green to a greyish blue right and beyond.
hand print - undevelopedhand print developing


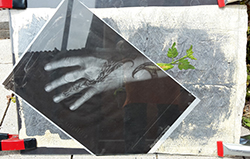
If left in the sun long enough, one achieves a beautiful dark Prussian blue, while the parts that the sun can’t access remain white (or the colour of the substrate).

hand print - developed

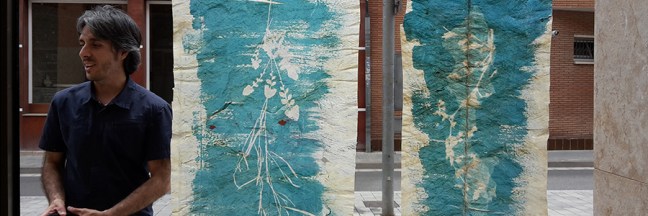
To dry the developed “photographs”, the wet pieces were just stuck to the large window of the gallery. I was so pleased with the outcome that I could not help but take a selfie…
Andrea and one of the blue prints

Washing tapa…

… for a new project

Fine tapa from FijiTongan tapa is predominantly Broussonetia papyrifera or paper mulberry. It is the finest I’ve known, with the exception of a gauze-like piece of tapa from Fiji (left) that I saw at the recent Tapa Festival in Tahiti in November 2014 . For me as lace maker and tapa enthusiast, using this natural material is an ongoing challenge.

A friend brought me some unpainted tapa (feta’aki) from Tonga. I haven’t measured the cloth, but it is about 1.20 metres wide and many metres long. Length and width of individual strips depend on the size of the sapling that has been harvested for beating. It varies slightly.

Tongan tapa or feta'akiTapa makers in Tonga layer and join those individual strips to make a larger piece for their final printed ngatu.

Patch on Tongan tapaAny holes and tears are patched by pasting small pieces of tapa over the area with starch.

Look through tapaWhen holding up against the light and looking through such cloth, the doubled areas form quite a pattern – and tell a tale of the tapa’s quality perhaps…

My plan for a new project is to dye this paper mulberry tapa with fabric dye. I assume that the contact with the liquid dye will dissolve the starch and the joints and patches will come apart. I prefer to work with the individual layers and their ‘imperfection’ anyway. Luckily we have a rather deep shower tray, because my large plastic basin is too small to submerge the long feta’aki in enough water to soak it.

wet tapaAs soon as the water penetrates the material I can already see that the pieces separate. After agitating the bark gently, because wet tapa has very little tensile strength and can easily be ripped, I can take out the separate lengths of bark. I gently squeeze them, roll them up in a thick towel and wring that towel-tapa sausage to get rid of as much water as I can before spreading the bark on a table to dry. I have covered our studio table with sheets.

length of wet tapaIt’s a bit like detective work to discover how many larger and smaller pieces hide in such a squeezed-out ‘snake’.

layers of tapaI find out that it’s usually two, sometimes three lengths that have most probably been beaten together. The bottom part of the bark is much thicker, the top usually very delicate and lacy. That’s why they are placed so that the bottom part of the one comes to ly on the top part of the other and thus give an even thickness.

beginning of a layer of tapaI have to find the beginning of one separate layer and pull or lift the piece and let gravity do its job.

holding up layers of wet tapaI love the contact with such, at this stage, very delicate material. I find that I have to respect its specific properties, if I want it to work for me and through handling it I get to know its strengths and weaknesses – and my own.

Studio full of tapaEventually all possible flat surfaces of my large studio are covered with fine tapa. Swimming in the bowl near the water’s surface are the fallen off patches. I skim them off, spread and flatten them, long and narrow, square and rectangular, hand-size and smaller, placing them in the spaces between the other longer strips. In my mind’s eye, the new work begins to grow. All I need now for the colouring is a day of sunshine which is required to develop the light-reactive dyes full brilliance.

Many tapa pieces To be continued…


Tapa and rust (6)

Tapa and gauze

I have brought a new piece of Banyan bark, this time only just beaten to become flexible enough to wrap it around the magic frame. Like the previous piece, as soon as I wrap the bark around the metal, the blackening process begins. I love that magic!

Tapa and gauze - close-upI have also wrapped a piece of eucalyptus-dyed gauze on the outside, part of which just sits on the metal, the other part covering the tapa. I want to find out, whether the area that covers the tapa will be dyed a different colour, i.e. whether the tapa’s own ‘juice’ leaves a trace.

Knobbly frame wrapped with tapa and gauzeThe weather is not so wonderful and I’m in a hurry, so I just drive to the beach and bring the frame back to unwrap at home. What I find is quite photogenic.

Tapa and gauze brown and grayDry tapa and gauze close-upYes, the tapa has added some brown colour to my gauze. Where it has just touched the metal it is only a mottled gray.

Sculptural tapaThe dried bark keeps its shape as I carefully peel it off the frame. I should leave it as is and use it as a sculptural piece…

Beating the tapa againHowever, my intention is to soak the dried bark and beat it until it is as thin as possible. I’m glad we live way outside the village, because it is a Sunday morning when I sit down to do that. I just hope the lovely sound of my tutunga (wooden anvil) will not be heard in church…

Folded wet tapaTapa SpiralTapa fibres and ikeTapa finished beating I fold the strip lengthwise and beat it, beat it, beat it, unfold and refold it and keep beating some more until I run the risk of ripping it with the next beats. Only then am I satisfied.

Tapa thin enough to see thruIn its wet state, the tapa’s colours are rich; they will fade a bit as the bark dries.

Tapa with beater marksThe material is thin and see through. One can clearly see the marks the ridges of the ike (beater) have left behind. I had hoped that I could perhaps beat tapa and gauze together, but that hasn’t worked out. I feel tempted now to experiment some more with gauze…