Spirit Sail – Design (1)

two sails

The Sail

A sail can be defined as a large piece of strong cloth that can catch the wind to move a vessel or vehicle forward.[1] Sails, affixed to single hull and double hull voyaging canoes, were instrumental in the discovery and population of the Pacific islands. Their form reflected in infinite variety the imagination and experimentations of the different peoples who explored the vast extensions of the Pacific ocean and populated their countless islands.[2]

Pacific islands sail shapeMost of their sails were triangular, attached to v-shaped spars. They were made of vegetable material such as pandanus which was plaited in strips and might have been sewn together with cord twined from bark fibres such as oronga (Touchardia latifolia) or au (Hibiscus tiliaceus).

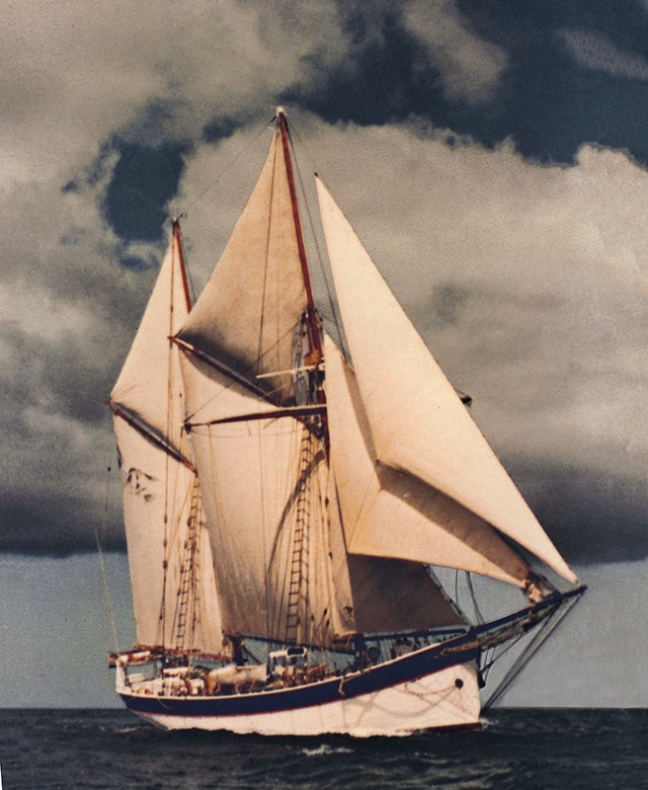
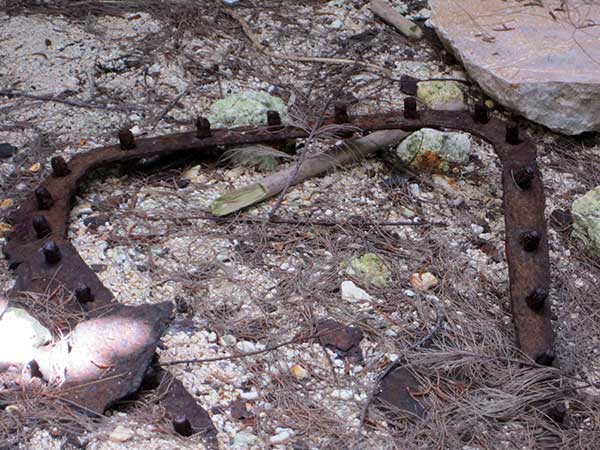
Even though the wooden and later iron sailing ships of seafaring European explorers differed hugely from the well-balanced Pacific islands catamarans, their square or triangular cloth sails were also shaped to accommodate the play of wind and water forces. Like the Edna, they had many differently shaped sails.

Edna all rigged upSailcloth, also called ‘duck’, derived from the Dutch word for cloth = doek, was woven from strong flax or hemp, and in the 19th century, cotton fibres[3]. Today, most sails are made of synthetic materials[4].

Spirit

Spirit – from Latin spiritus = soul, courage, vigor, breath[5] – can be considered the non-material, the essence, the animating force that brings a body to life, the energy that propels us forward (French: l’esprit), the in-spiration that gives a project momentum, the a-spiration that causes us to reach a goal. Spirit is synonymous with psyche, soul, and in some languages such as my own (spirit in German = Geist) with mind. Spirit is “the self-supporting absolutely real ultimate being (Wesen = essence).”[6]

What would a Spirit Sail have to look like?

In my “quest for the perfect shape” of this ‘spirit sail’ I learn that “[t]here is no such thing as the best sail shape – there are countless different “best” shapes, depending on the wind, waves, boat type & size, even weather & air temperature.”[7] Duh, no help here! I guess, it will be entirely up to my imagination.

So: what do I want it to look like?

  • it should have a preferably universal sail shape to be recognizable as a sail
  • it should be transparent to refer to the spirit’s invisibility
  • it should be delicate without being frail to hint at spiritual acuity
  • it should be visible in daylight and at night-time to symbolise the infinity of spirit
  • it should be textile – textile signifying for me both text and touch
  • it should be large enough to be seen from afar and small enough to be made in my studio

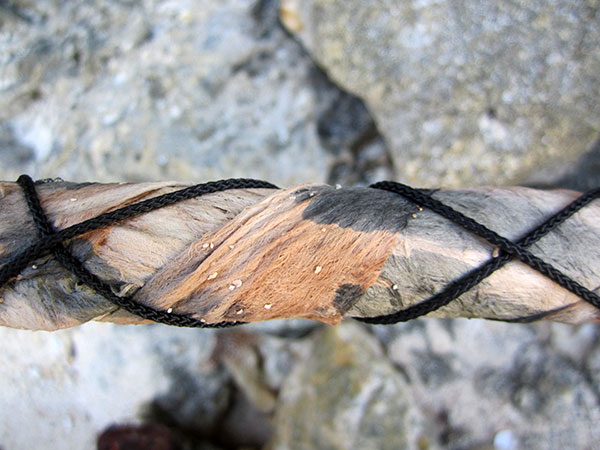
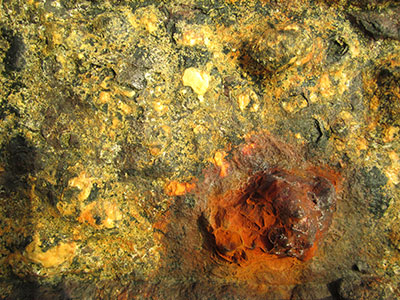
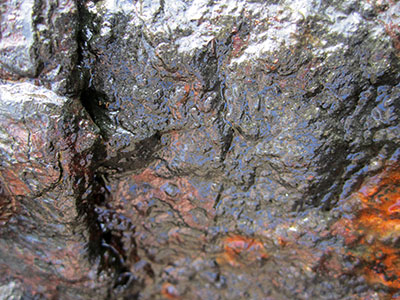
I will use the materials that I have brought and will still bring in touch with the Edna’s remains. I ordered Polymer ribbon that glows in the dark after having been exposed to UV light. I am awaiting textile heat-set paint medium to experiment with rare earth pigments that have the same effect.

From photographs I could gather that both the Edna and our Cook Islands Vaka (double-hull voyaging canoe) “Marumaru Atua” use(d) a jib. Consequently my spirit sail will have a jib-like triangular shape. Based on the dimensions of the Edna, a suitable jib’s longest side would have to be some 12 m long. However my sail will not have to be functional and for practical reasons I will make it half that size which is more manageable considering work space and materials.

Lessons

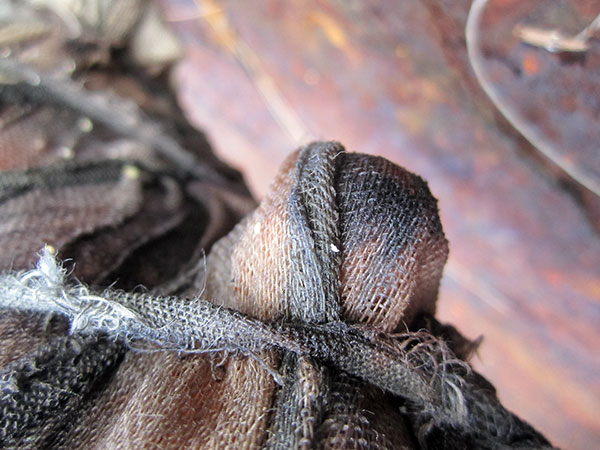
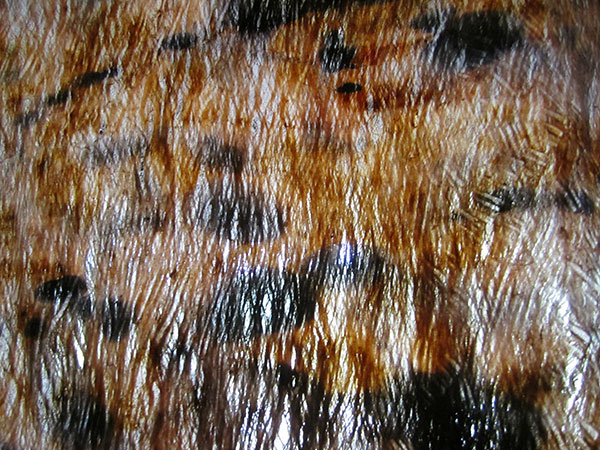
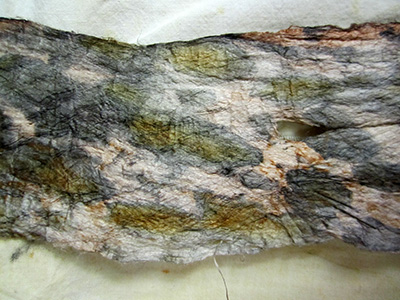
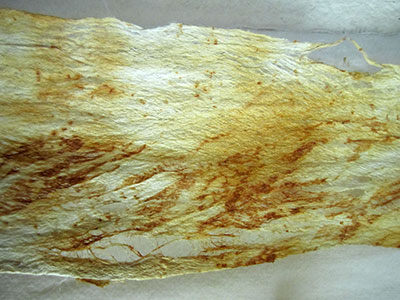
My first experiment relates to the woven strips that Pacific islands sails were made of. I tear two of my rust-impregnated fabrics into strips and weave them together.

woven farbic stripsThe double layer of woven strips will make the resulting cloth strong. Once finish I realize that the cloth, being much softer than dried pandanus strips of course, does not hold together all that well when woven in strips.

sewing the woven stripsThe weaving needs to be strengthened by sewing the layers together so that the sample can keep up its shape under the stress of movement. First lesson learned.

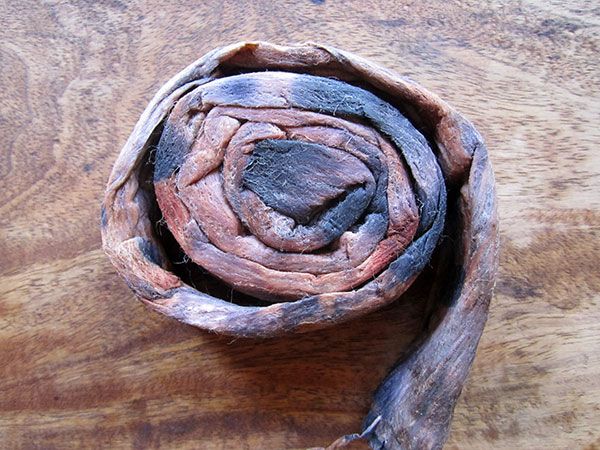
I decide that I don’t want to paint a design on to my sail, but I don’t just want it to be plain either. I want the design to develop from the way I manipulate the various materials, be it their shape or their colour or both. Both waves and the airflow that propels a sail forward create vortices[8]. This has inspired me to use the spiral as my spirit sail’s symbol.

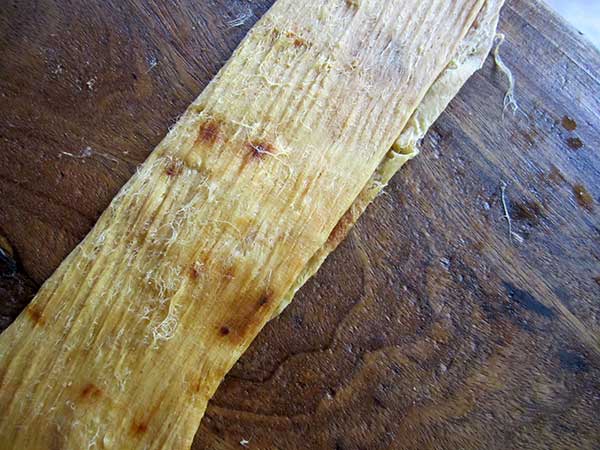
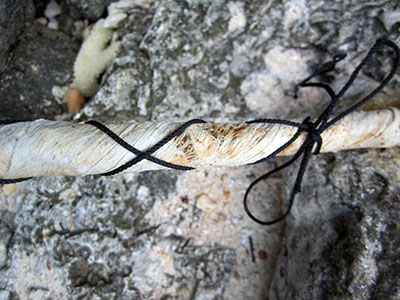
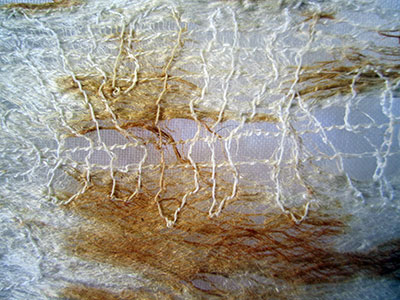
Machine-sewn lace techniques will give my sail certain transparency. My next sample uses some of the torn-fabric strings, with which I have bound materials to the Edna’s remains, as basic material.

pinned fabric stripsThe ironed strips are pinned to soluble stabilizer to stay in place while joining them together. The stabilizer will eventually be washed out once the sewing is finished.

The wet season has started and I learn my second lesson: Fabric that has been soaked in salt water – as have all the fabrics that touched the Edna – needs to be washed until all salt has been washed out! I was too lazy to do so and now find that the salty fabric soaks up moisture from the air. The moist fabric makes the water-soluble (!) stabilizer sticky and nearly impossible to work with!

strips lace I cannot use the free-form technique I had in mind but I get there in the end…

luminescent ribbon
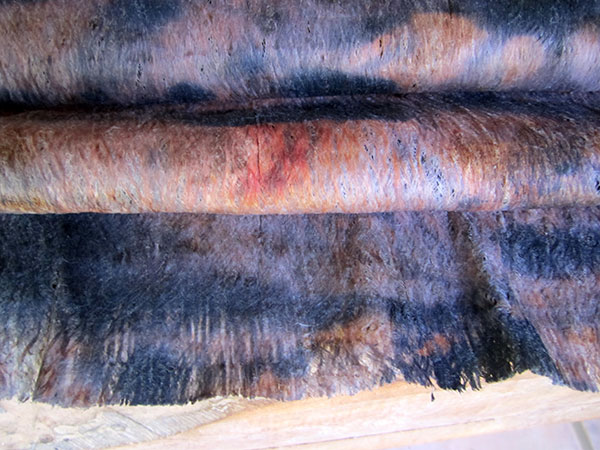
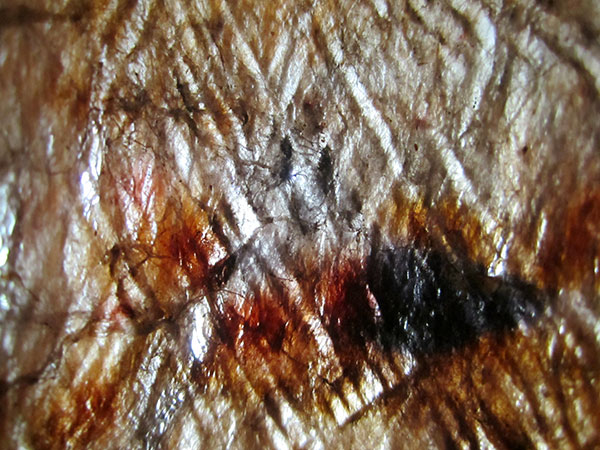
In this sample I incorporate small pieces of the fairly expensive luminous ribbon just to try it out. The material is very rubbery and not exactly easy to sew through. My machine skips a few stitches here and there. I learn my third lesson: I need to reduce the speed when sewing over the ribbon.

glow in the darkI am happy with the way it glows in the dark. The ribbon certainly has potential and offers me more design possibilities.

Photoshop

There are endless possibilities for patterning the sail. The two sewing samples are only the start. I use Photoshop and play with their photos to get an idea of what can be done.

three sails

sail sketch photoshopped

[1] http://www.merriam-webster.com/dictionary/sail

[2] Guiot, H. (2007), Va’a – La pirogue polynésienne, Au Vent des Îles, French Polynesia: Tahiti

[3] http://www.thedearsurprise.com/a-brief-history-of-sailcloth-during-the-age-of-sail/

[4] http://en.wikipedia.org/wiki/Sailcloth

[5] spirit. (n.d.). Dictionary.com Unabridged. Retrieved December 04, 2014, from Dictionary.com website: http://dictionary.reference.com/browse/spirit

[6] Hegel, G.W.F. (1807, 2010), The Phenomenology of Spirit (The Phenomenology of Mind), Digireads.com Publishing, Kindle Edition, Loc. 6336

[7] http://www.wb-sails.fi/Portals/209338/news/98_11_PerfectShape/Main.htm

[8] http://www.wb-sails.fi/Portals/209338/news/99_1_AeroShape/Aero.htm

Edna’s own sails

Edna all rigged up

While conducting my experiments, I have also been researching the Edna’s background. I want to know more about her history, however there is not much that can be found on the Internet.

The Edna’s last captain, the late Nancy Griffith, lived in Hawaii. My artist friend Judith Kunzlé lived on Rarotonga when the Edna sailed Cook Islands waters and  knew Nancy. Judith recently moved to Hawaii. Today she sent me a copy of Nancy’s stunning photograph of the Edna in full sail. Isn’t she beautiful?

If any of you, readers of my blog, has any information or photographs on MS Edna and her history, I’d much appreciate to hear from you.

Tapa and rust (6)

Tapa and gauze

I have brought a new piece of Banyan bark, this time only just beaten to become flexible enough to wrap it around the magic frame. Like the previous piece, as soon as I wrap the bark around the metal, the blackening process begins. I love that magic!

Tapa and gauze - close-upI have also wrapped a piece of eucalyptus-dyed gauze on the outside, part of which just sits on the metal, the other part covering the tapa. I want to find out, whether the area that covers the tapa will be dyed a different colour, i.e. whether the tapa’s own ‘juice’ leaves a trace.

Knobbly frame wrapped with tapa and gauzeThe weather is not so wonderful and I’m in a hurry, so I just drive to the beach and bring the frame back to unwrap at home. What I find is quite photogenic.

Tapa and gauze brown and grayDry tapa and gauze close-upYes, the tapa has added some brown colour to my gauze. Where it has just touched the metal it is only a mottled gray.

Sculptural tapaThe dried bark keeps its shape as I carefully peel it off the frame. I should leave it as is and use it as a sculptural piece…

Beating the tapa againHowever, my intention is to soak the dried bark and beat it until it is as thin as possible. I’m glad we live way outside the village, because it is a Sunday morning when I sit down to do that. I just hope the lovely sound of my tutunga (wooden anvil) will not be heard in church…

Folded wet tapaTapa SpiralTapa fibres and ikeTapa finished beating I fold the strip lengthwise and beat it, beat it, beat it, unfold and refold it and keep beating some more until I run the risk of ripping it with the next beats. Only then am I satisfied.

Tapa thin enough to see thruIn its wet state, the tapa’s colours are rich; they will fade a bit as the bark dries.

Tapa with beater marksThe material is thin and see through. One can clearly see the marks the ridges of the ike (beater) have left behind. I had hoped that I could perhaps beat tapa and gauze together, but that hasn’t worked out. I feel tempted now to experiment some more with gauze…

Tapa and rust (5)

Untying knots

Excited and curious, Kareen and I return to Ava Tapu beach. Will the frame still be there? I don’t really feel like digging it out of the sand again. I would be sad to have lost such a valuable piece of rust. Does that sound strange? One (wo)man’s trash is this rust dyer’s treasure… As we descend I am relieved to see the boomerang-like shape of the frame still stuck in Edna’s bow. The bark has dried and is stuck to the frame. Untying the knots in the builders line is a fiddly job.

Peeling off tapaProtrusions

I carefully peel the thin bark off the rusty metal. The coloring is so wonderful, ranging from yellow to rusty-brown with black stains where the frame has made contact with the soaked bark. The frame’s protruding screws have moulded the bark and embossed their shape into the material. Do I really want to beat it again?

Coloured like a flame Sea through

I like the bizarre, flame-like shape the tapa has now. Held against the light we can appreciate how thin the bark is. It is firm and yet soft to the touch. What must it have been like to wear such bark as a garment?

Don't remove tapeEven the “dont-remove tape” has acquired new colours in all shades of the rainbow. The wash-away frame has become my favourite rusting tool. I wrap it with a new piece of cloth to have something to look forward to when I come back next time.
Re-wrapping the rusty frame

Tapa and rust (4)

Frozen banyan bast

I have taken a piece of banyan tapa out of the freezer to thaw. It was harvested and wrapped in ti leaves (Cordiline terminalis) when we did the tapa making workshop with the senior art students at Enuamanu School a year ago. Keeping some samples of bark was my ‘payment’ for filming the event. I have never frozen fresh bark and am all curious how the bark feels to the touch and how it will be to beat it.

Beaten banyan bastFreshly harvested bark is tough at first. I can see from the discolorations that it must be a piece that has been buried in the sea during last year’s experiments. I notice with the first beats that this bark is beautifully soft and requires much less strength to “crack open”, i.e. loosen the fibres. It means I got to be careful not to beat too hard so as not to produce holes right away. My intention is just to beat it a little bit and then take it down to Ava Tapu beach to affix it to a part of the Edna. Having this amazingly soft piece of banyan on my tutunga (wooden anvil) carries me away and I go on until it is nearly finished.

Beating folded banyan bastI try out a new technique of folding the bark length-wise so that I end up with beating a parcel of fibres. I would love to beat it thinner, but stop right here. I might moisten it again and beat it some more after it has been in contact with Edna.

Tapa project Enuamanu School 2013It amazes me to return the bark to this same beach under whose coral boulders it had been buried last year. Little idea did I have then of the journey this tapa would undertake. Bringing it back to the Edna now is only the beginning of a new phase…

Uncovered rusty frameWe have just uncovered the “wash-away frame”. It will be a wonderful piece of the Edna to do its magic with this tapa piece. I wrap my “don’t remove tape” around the frame as well to secure the tapa as best I can.

Tapa already black

Tapa-wrapped frame hung high

I can’t believe my eyes when the colouration is almost instant at the contact with the salt-water-soaked tapa. This time I place it high up on Edna’s bow, wedging it into a hole and hoping that the sea won’t steal it. Will it be there tomorrow? What will it look like then?

The wash-away frame

Rusty frame

In search for rusty bits and pieces that will help me dye fabrics, I wander into the bow of the Edna. She welcomes and rewards me instantly. I find this amazing frame with protruding screws on both sides that promise me regular rusty dots – my inner eye can just see them…

I drag the frame to the front where I have placed the collections of “fabrics of the day” and some lengths of builders line. There is better light here and some coral boulders that serve me as work tables and chairs. Soon the frame is safely wrapped with salt-water-soaked cotton fabric and bound tightly.

Wrapped frameThe sea has been calm. I decide to place the frame in front of Edna’s bow, high up on the beach in the sand in order to let the frame’s weight add some extra pressure to the fabric for better marking.

When I return the next day, I am shocked. According to my time calculations it should be low tide and the sea calm. Instead high waves are still breaking on the bottom of Ava Tapu beach and – my precious frame has disappeared! Disappointed I scan the beach area.

Buried fabricEventually I find a small cloth surface that protrudes through the pieces of coral and sand, buried between two heavy boulders right by the edge of the sea some ten meters or so away from where I had placed the wrapped frame. With a stick I try to dig it out but to no avail. I mark the area with my digging stick, just in case. I will have to return with a shovel. Normally I power-walk down to the beach which I will certainly not do with a shovel on my shoulder…!

Kareen, a new friend, arrives to stay with us for a week. I have seen on her blog that she is an excellent photographer. Kareen offers to help me with the digging so we take the car down to the beach.

Buried frameWhen I look for my mark it has – of course – disappeared. After some searching I glimpse a rusty fabric patch under a different boulder and the digging can begin in serious. Sand and water have sucked and pushed the wrapped frame deep under.


The two of us take turns in digging, scraping, pulling and photographing until we are finally rewarded with some movement. The frame’s sides have come unwrapped. Both have broken shorter.

Digging outThe fabric has acquired beautiful patterns of all shades from black to orange. The material seems intact with the exception of a few holes. Like sand-washed jeans, I think. If ever I want to ‘age’ fabric artificially, now I know what to do: bury it in the sand at Ava Tapu beach.

 
After some more digging we can grab at the fabric and pull, pull hard and – yay! Finally the sand releases the frame and its wrapping cloth.

Untying knotsUncovered fabric
I can’t wait to untie the knots to release the fabric. What a delight of colours!

Rusted wrapping clothIt is just the right light this late afternoon.

Washing out sandThe sand needs washing out.

Sun patterns on floating fabricThe sun paints patterns on the floating fabric.

Rust and reefIt is low tide, the sea and the sky are of a deep blue. Orange growth on the reef echoes the colours of Edna’s new cloth.

KareenRelaxing from the hard work we are happy about the result

Orange sunset All we want now is an orange sunset.

Tapa and Rust (3)

Banyan on rusty rod

A rainy day in between prevents me from returning after 24 hours and gives my experiment some more time to show results.

Wow! I have not expected such amazing confirmation of my theory that the reaction of tannin with the iron oxide, which is possibly contained in Banyan barkcloth, will produce black discolouration.

Spotted Banyan tapaNot only am I rewarded with deep black rust stains, even a pattern has formed where the strings have pressed the bark firmly against Edna’s magic rusty rod. This now makes me wonder what would happen, if I wound a freshly beaten strip around the magic rod? I still have some unbeaten bark in the freezer which I will use for that next experiment. How exciting! Watch this space…

Tapa and Rust (2)

Black stains on dyed tapa

The plain white tapa strip, which has been through previous water baths and perhaps even a bleach treatment, has shown me only orange rust stains. However, the two pre-dyed tapa strips reward me with a remarkable result when I return the next day.
Black and yellow stains on tapaMy theory was correct: the pre-dyed pieces of tapa show black stains after the chemical reaction between the tannin-rich plant dye and the iron oxide. I can’t figure out how the brass-coloured stains come about, but it’s the black I’m after at this stage. It makes me wonder what would happen, if I tied a piece of Banyan (Ficus prolixa, on Atiu called ava) around my magic rusty rod.

Banyan barkcloth in sunsetBeaten Banyan bark naturally turns a rich orange brown. Two fermented pieces have been joined together by beating. Perhaps this kind of tapa still contains enough tannin to react with the iron oxide?

Banyan and Paper Mulberry barkclothTogether with two square pieces of lace-like Paper Mulberry barkcloth, I have brought a sample from last year’s tapa making workshop at Enuamanu School. Now I have two questions: Will the joined seam stick together after soaking the bark in sea water? And will the contact with rust produce black stains? I will find out next time I visit the Edna at Ava Tapu Beach…

Tapa and Rust (1)

Strips of bark cloth

Now that I have a better idea which parts of the Edna will help me harvest successful rust prints, I feel brave enough to experiment with some samples of tapa (barkcloth). They are left-overs from previous projects. White cloth from Paper Mulberry bark (Broussonetia papyrifera, locally called aute) is precious for me, because it has been extinct on Atiu and I have only just recently planted three seedlings which I got from Rarotonga. They are not yet tall enough to use. My sample pieces have been produced in Samoa and Tonga.

Tapa and laceOne is a leftover from my Third Space installation. Parts of it are filled with machine-sewn lace.

Rust stainsA long white strip seems ideal to wind around my rusty rod.
Rusted tapa stripWhen I return the next day, I’m rewarded with lovely orange stains.
Rusty threadEven the Polyester thread in the lace has taken on colour.

The first two tapa strips seen in the image on top were used in a previous eco-dye experiment. They clearly show the resist marks and brown dye. I’ve been wondering what will happen to those pre-dyed strips which have not been rinsed after dyeing. Will they still contain the dye’s magic? Will the tannin in the eucalyptus dye react with the rust? My guess is that this should produce black stains. After I have taken off my nicely rusted white tapa strip, I apply the two dyed pieces to my rusty rod. Now I will have to be patient for a day or so…

Rust

Rusty Edna

By now I have discovered which rusty parts of the Edna give me no prints, some prints and really good prints. Rust results from exposure of iron or steel to oxygen (air) and moisture (water). The process can be intensified through contaminants such as salt. I found information on the Internet about the different kinds of rust. There are four easily distinguishable categories:

Red rustRed rust or hydrated oxide (Fe2O3•H2O) which results from constant exposure of iron to air, water and, in this case, salt.
Yellow rustYellow rust or iron oxide-hydroxide (FeO(OH)H2O) which can be found in areas that are constantly exposed to high moisture, like standing water.
Brown rustBrown rust or oxide (Fe2O3) which is a drier form of rust and most likely atmospheric, i.e. a reaction to humid air and contaminants such as salt.
Black rustBlack rust or iron (II) oxide (Fe3O4) which forms in a low-oxygen environment like under water.
Suspended cloth with rust chipsFor a good result of my dye experiments, the overall firm contact of cloth and oxidised metal is important. I learned by experiment that this excludes a large amount of rusty remains which cannot be properly wrapped either for their size or place, as e.g. on the bow of the vessel where attachment is a challenge if not impossible.

Beach dog

A little bay at the end of Ava Tapu beach where bits and pieces are stuck between blocks of coral has become my prefered ‘harvesting’ ground. My dogs enjoy our excursions there, because they like playing with the crabs that hide between the boulders.
This rusty rod is my absolute favourite rust supplier. It leaves wonderful traces on my pieces of cloth.Rusty stick