Cyanotypie – a workshop

Paulo Cacais at Tigomigo Gallery

In June 2018 I enrolled in a workshop at Terrassa’s wonderful art gallery Tigomigo. Its owner Paulo Cacais introduced us to the secrets of cyanotypie.

Cyanotypie is a photographic process that results in cyan or Prussian blue prints. It was invented in 1842 by Sir John Herschel. British botanist Anna Atkins used it immediately in a series of botanical books published in 1843. She can thus be considered the first (female) photographer. Blueprints were widely used for many decades in architectural offices until alternative methods were invented in 1942 . Artists still use it today.
Blueprint works of R. Eretz and L. Elkivity

During my visit to Tel Aviv at the end of 2017, I was fortunate to meet the artists Rachel Eretz and Lucy Elkivity in their studio and admire their co-operative blueprint works (left). The technique resembles the sun-dyed pareu we used to make in the Cook Islands. I became curious to find out if I could use this method on tapa.

I took some pieces of Tongan tapa with me to the workshop. In his dark room, Paulo showed us how to dissolve small amounts of potassium ferricyanide and ferric ammonium citrate in warm distilled water and apply the greenish solution with a brush to the surface of our substrates. The prepared pieces were then left in a dark place to dry.

Circles and gauze
My first idea with embroidery frames and gauze fabric did not give good results, since it had to be kept inside so the wind would not blow it away and could thus only be developed through the window.
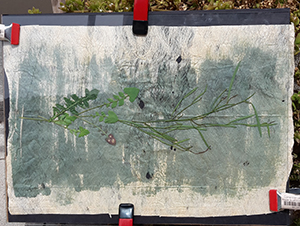
weeds as print material

On a supporting frame, under glass plates held in place with clips I could then arrange my printing material on the dried substrates. I opted for plant material which I found outside the gallery.


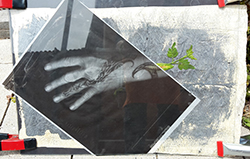
Paulo had the great idea to scan my hand, print it out on transparent paper and use it as a “negative” that the sun could develop. It is amazing how quickly the colour of the chemicals turns from a light green to a greyish blue right and beyond.
hand print - undevelopedhand print developing


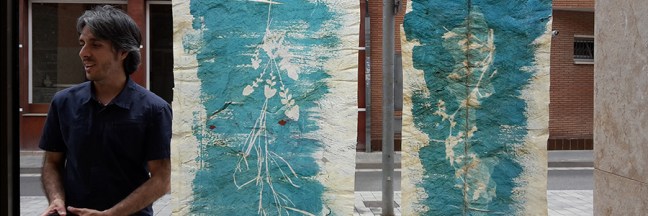
If left in the sun long enough, one achieves a beautiful dark Prussian blue, while the parts that the sun can’t access remain white (or the colour of the substrate).
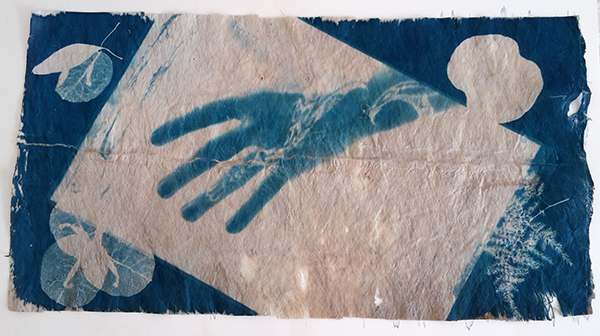
hand print - developed

To dry the developed “photographs”, the wet pieces were just stuck to the large window of the gallery. I was so pleased with the outcome that I could not help but take a selfie…
Andrea and one of the blue prints

Un pas més – Another Step…

Between art works

…is the motto of the exhibition. And surely, for me this much appreciated challenge has been a step forward.

Going back to the beginning: newspaper as material. Cool!. How could I use it? It was clear that it would have to be “my way”, i.e. sewn lace. However paper is fragile. What to do about it?

text printed on fabricI could print a newspaper extract onto fabric (left).I wanted it to be a meaningful text, though. Where would I find one in such a short time? And then, what to do with that text? Hmmm, somehow that wasn’t convincing.

newspaper scraps
The technical question was, how to stabilise paper? With iron-on interfacing (above).

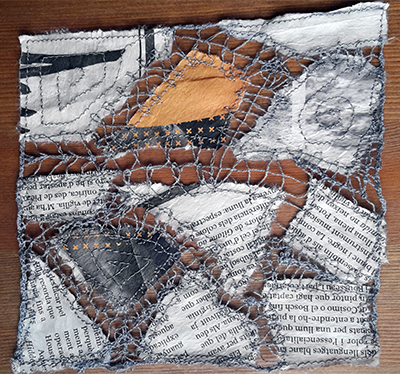
lace of newspaper scraps
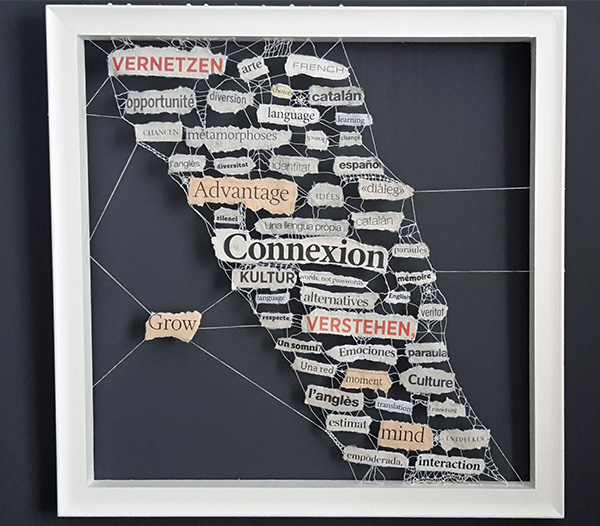
Yes, this did work, however, where was the message? I could look for meaningful words. Which language should I use? German – my native language, English – a language I sometimes find easier to work in (!), Castellano – the country’s language, or Catalán – the regional language I am only just beginning to learn and love?

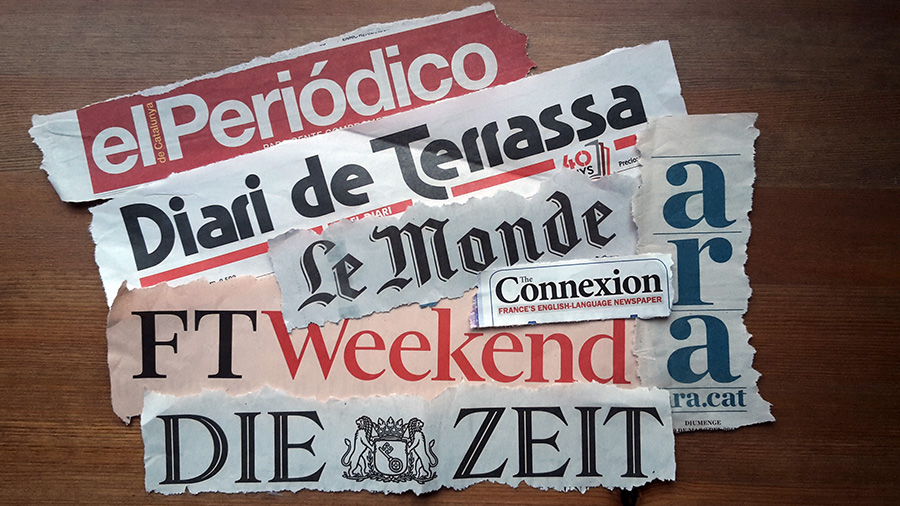
No! All the languages I speak, I decided. Then I went in search of international newspapers.
various newspapers
words, collageMany interesting articles later I had a good collection of words I could use. I arranged them so they’d transcend the confines of the frame (left). The words could  be sewn (right)…

alternatives - sewn wordHowever,  that turned out to be too labour-intensive for the short time period, so this will become a separate project to be continued…

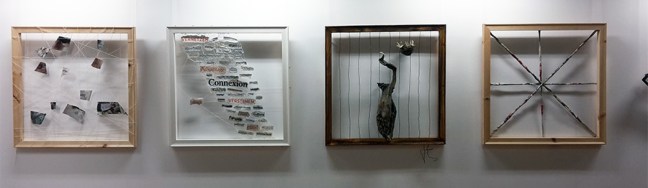
beads to attach the laceIn the end I found words that satisfied me and joined them with machine-sewn lace. I didn’t much like the frame and thought that the natural wood colour made it stand out too much. White paint was the answer. For weeks my workroom smelled of paint! However, it did the trick. I drilled holes in the frame to attach the lace with beads (right).

Between Wor(l)dsAnd, voilà, the work was finished. The title came easily: Between Wor(l)ds – my favourite space to be.

My work can be seen during the four days of the Festa Major (city festival) de Matadepera at the Casal de Cultura (culture centre) – between other interesting works of local artists who have also submitted to the challgenge of frame and newspaper. We have all done “un pas més” – another step.

Back on Track

During the time of transition from one side of the world to the other, from island to city life, from wife to widow, from full-time work to (semi-)retirement, I managed to create a wonderful circle of choice family members and friends in my new Spanish home town and nearby. To all these amazing people I owe my sanity.

new work roomNearly two years had to pass before I was able to start creating again. I have adjusted to my much smaller workroom (above) and won new artist friends.

words, collageThese encouraged me to join an art group in a neighbouring town, the Matadepera Col•lectiu d’Art, and participate in their art exhibition. All participants had to use a frame sponsored by the city council of Matadepera and newspaper in our works (left).

I’ve always wanted to work with text.  This was a much welcome challenge. It finally broke my artist block.

Tomorrow will be the inauguration of our exhibition. I’m so excited! I will keep you posted…

pin board

Dust to Dust…

Dried bouqued 35 year later

… Ashes to Ashes

Almost a year has passed since my last post on 9th February 2015. It has been a pivotal year in my life. Quite unexpectedly, in March my husband Juergen began his final journey to the other side of the world and eventually of life. For me, too, this meant leaving for good my beloved home island of Atiu. Circumstances forced us to forsake most of what had formed our daily life and identity for 31 years. In May, all arrangements were finished and I could follow Juergen to Germany to attend to his needs. In early July, I lost my loving partner of 35 happy years, Juergen Manske-Eimke.

Our wedding day

Witnesses signature

just a shadow remains

Many friends in all corners of the world supported us during this arduous journey. I have no words to express my gratitude. The love of my Spanish “family”, whom I have known since childhood days, has kept me strong and positive. With their help I found a new abode in their delightful home town close to Barcelona in Spain, where I have now been living since August 2015.


Tapa and Fermentation

tapa with arrow watermark

Making Tapa Eastern Pacific Style

Te Rangi Hiroa (Peter H. Buck) writes in Arts and Crafts of the Cook Islands that the tapa makers of the time (1944) wrapped the pre-beaten bark in banana leaves and left it to ret for three days. Today’s tapa makers on Atiu usually beat the bark right away. When making a larger piece such as a garment, several strips are joined together with glue. In times past, retting, a water-aided fermentation process, loosened the fibres and enabled the tapa makers to join the pieces together by a kind of felting (beating). Following a correspondence with Hawaiian kapa maker Dennis Kana’e Keawe, at the Atiu Fibre Arts Studio, at the Atiu Fibre Arts Studio we conducted a number of experiments in 1988/89 to try this method. He joined us in beating the prepared bark. In 2013, I agreed with the art teacher at Enuamanu School to repeat the experiment.

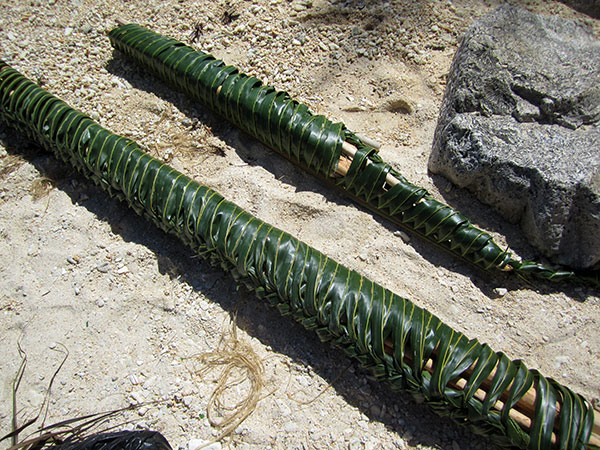
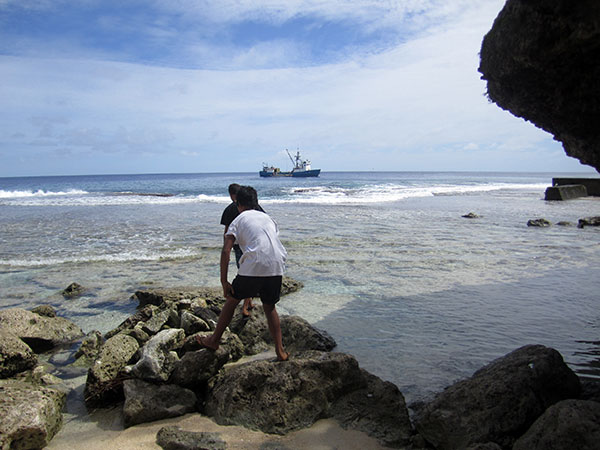
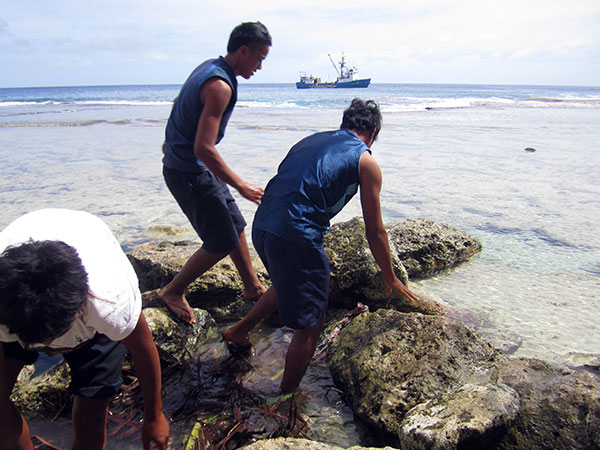
Atiu does not have running streams and water shortage is often a problem. However there is one particular beach, Avatapu, the beach on which the Edna was stranded, that Atiu women use to ret lemon hibiscus bark for making dancing costumes. That’s where, in 1989, we soaked our shaved bundles of banyan roots instead of heating them to enable us to get the bark off the wooden core. This process both softens and loosens the bark and preserves it at the same time. In 20213, the art students came up with an ingenious way of insuring that the bundles would stay together, by plaiting a coconut frond around the bundle.

bundles of banyan rootsHeavy boulders of coral have been thrown up on the beach’s edge at Avatapu. These serve as weight to keep the bundles submerged in the water and in place when the sometimes rough sea tries to steal them away. The beach is right next to our harbour and the cargo boat that brings cargo from Rarotonga to the sister islands had arrived that day.

burying tapa at AvatapuI am not sure whether it was light or salt water – or the absence thereof – that caused the basket’s pattern to be imprinted on some of the outer roots’ bark. Worth conducting more experiments to find out how I can achieve that purposely, I guess, but not right now. The bark we have removed gets rolled up in leaves and is left to ferment.

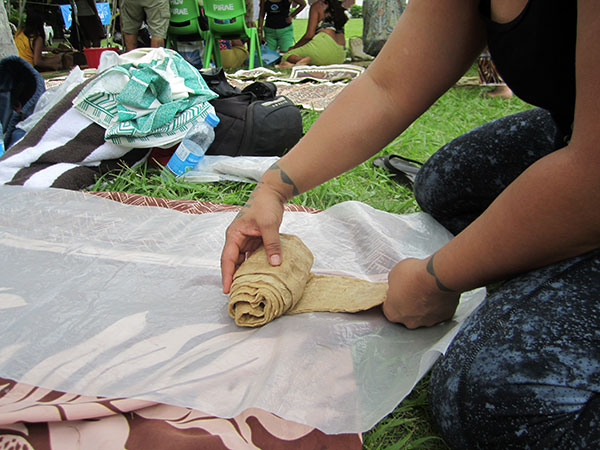
patterns on soaked banyanFermenting their paper mulberry bark is a distinctive feature of Hawaiian kapa (their word for barkcloth). During the Tahiti Tapa Festival in 2014, Honolulu tapa expert Moana Eisele and her assistant, Kamalu du Preez, demonstrated to us their innovative method. Fermented wauke (Hawaiian for Broussonetia papyrifera or paper mulberry) becomes very delicate to work with. Especially when you plan to make a wider sheet, moving it forward on the kua (Hawaiian for wooden anvil) can be quite a challenge. Moana therefore beats her kapa on a large sheet of plastic.

rolling-out kapa

beating kapa This serves to hold it when folding it over to felt together the fibres…

folding …and if she wants to keep an unfinished piece for another beating session the next day, it is ideal for storage, prevents the bast from drying out and might even keep it fermenting.

storing kapaHawaiians have patterned i‘e kuku (tapa beaters) with which they can ‘imprint’ a watermark into the moist bark that has been finished beeting into a fine sheet. Our Hawaiian friend Kana’e gave us a beautiful i’e which he had carved himself when he visited the Atiu Fibre Arts Studio in 1989. I love working with it, because it is well-balanced and wonderful to handle.

Hawaiian kapa beaterI used it to experiment with a small piece of mati (ficus tinctoria, dye fig). I had also put some triangular pieces of cardboard between the tutunga (wooden anvil) and the bark to try out some different ways of watermarking. As we can see here, it worked.

watermarks

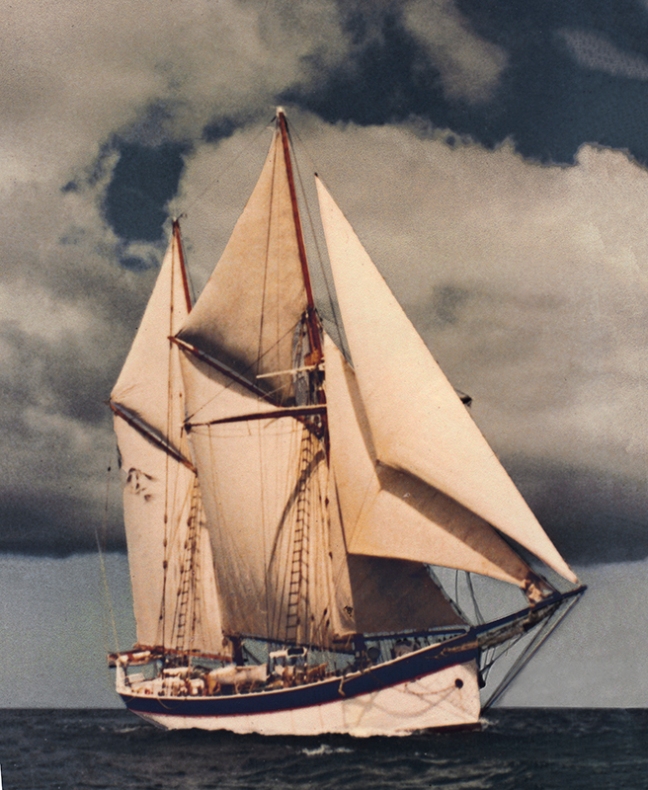
Edna’s own sails

Edna all rigged up

While conducting my experiments, I have also been researching the Edna’s background. I want to know more about her history, however there is not much that can be found on the Internet.

The Edna’s last captain, the late Nancy Griffith, lived in Hawaii. My artist friend Judith Kunzlé lived on Rarotonga when the Edna sailed Cook Islands waters and  knew Nancy. Judith recently moved to Hawaii. Today she sent me a copy of Nancy’s stunning photograph of the Edna in full sail. Isn’t she beautiful?

If any of you, readers of my blog, has any information or photographs on MS Edna and her history, I’d much appreciate to hear from you.

Tapa and rust (6)

Tapa and gauze

I have brought a new piece of Banyan bark, this time only just beaten to become flexible enough to wrap it around the magic frame. Like the previous piece, as soon as I wrap the bark around the metal, the blackening process begins. I love that magic!

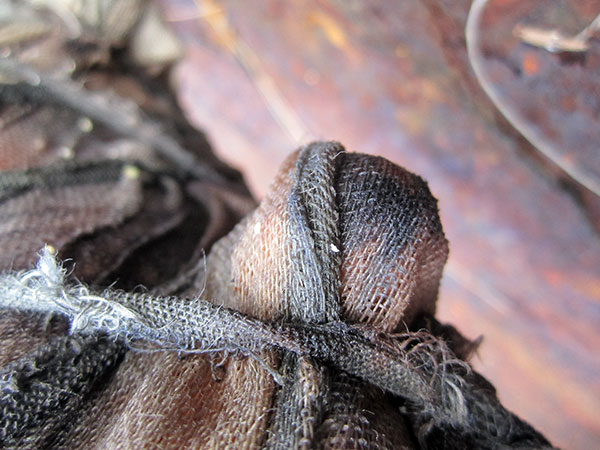
Tapa and gauze - close-upI have also wrapped a piece of eucalyptus-dyed gauze on the outside, part of which just sits on the metal, the other part covering the tapa. I want to find out, whether the area that covers the tapa will be dyed a different colour, i.e. whether the tapa’s own ‘juice’ leaves a trace.

Knobbly frame wrapped with tapa and gauzeThe weather is not so wonderful and I’m in a hurry, so I just drive to the beach and bring the frame back to unwrap at home. What I find is quite photogenic.

Tapa and gauze brown and grayDry tapa and gauze close-upYes, the tapa has added some brown colour to my gauze. Where it has just touched the metal it is only a mottled gray.

Sculptural tapaThe dried bark keeps its shape as I carefully peel it off the frame. I should leave it as is and use it as a sculptural piece…
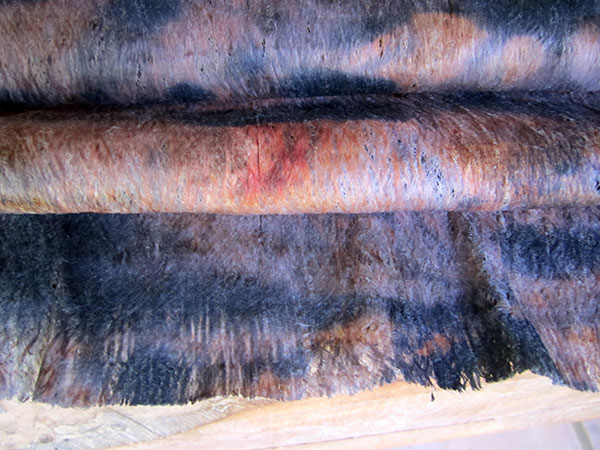
Beating the tapa againHowever, my intention is to soak the dried bark and beat it until it is as thin as possible. I’m glad we live way outside the village, because it is a Sunday morning when I sit down to do that. I just hope the lovely sound of my tutunga (wooden anvil) will not be heard in church…
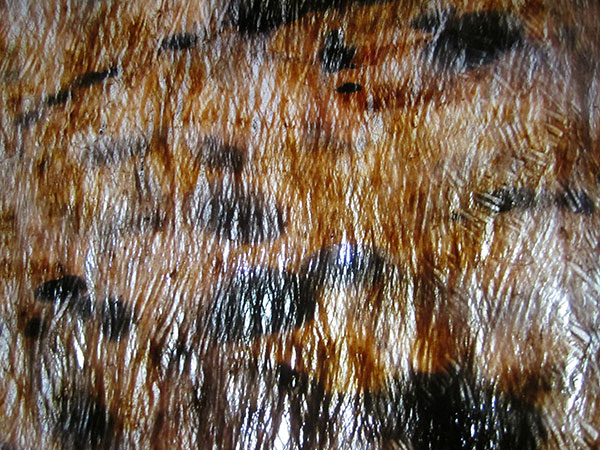
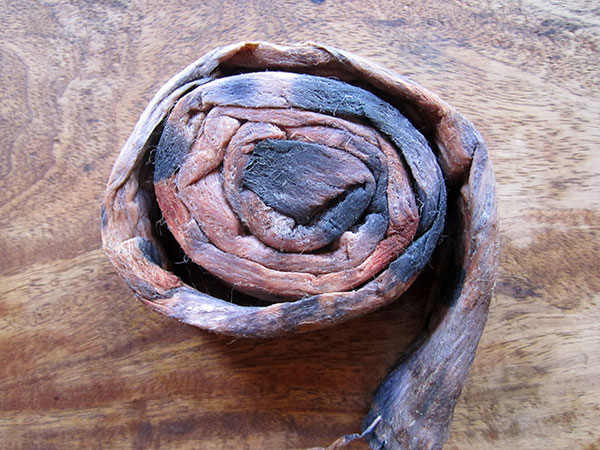
Folded wet tapaTapa SpiralTapa fibres and ikeTapa finished beating I fold the strip lengthwise and beat it, beat it, beat it, unfold and refold it and keep beating some more until I run the risk of ripping it with the next beats. Only then am I satisfied.

Tapa thin enough to see thruIn its wet state, the tapa’s colours are rich; they will fade a bit as the bark dries.

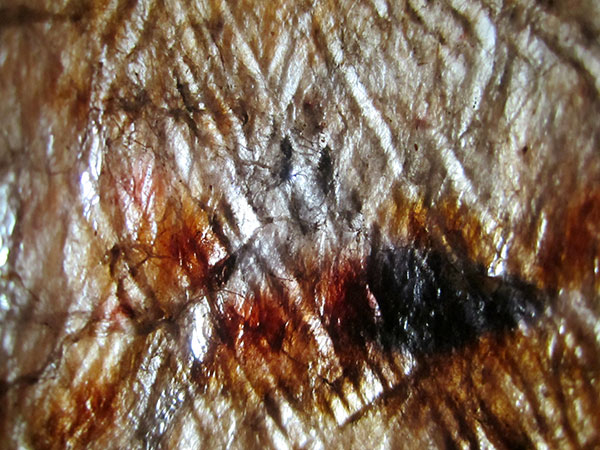
Tapa with beater marksThe material is thin and see through. One can clearly see the marks the ridges of the ike (beater) have left behind. I had hoped that I could perhaps beat tapa and gauze together, but that hasn’t worked out. I feel tempted now to experiment some more with gauze…

Tapa and rust (5)

Untying knots

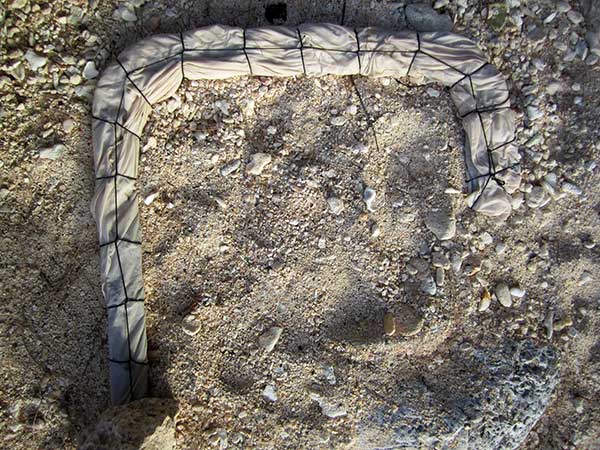
Excited and curious, Kareen and I return to Ava Tapu beach. Will the frame still be there? I don’t really feel like digging it out of the sand again. I would be sad to have lost such a valuable piece of rust. Does that sound strange? One (wo)man’s trash is this rust dyer’s treasure… As we descend I am relieved to see the boomerang-like shape of the frame still stuck in Edna’s bow. The bark has dried and is stuck to the frame. Untying the knots in the builders line is a fiddly job.

Peeling off tapaProtrusions

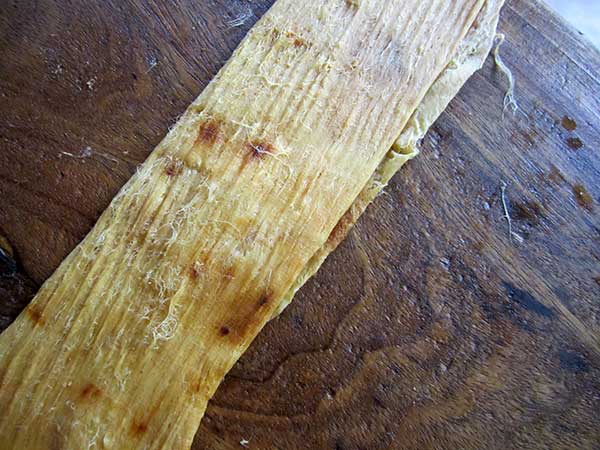
I carefully peel the thin bark off the rusty metal. The coloring is so wonderful, ranging from yellow to rusty-brown with black stains where the frame has made contact with the soaked bark. The frame’s protruding screws have moulded the bark and embossed their shape into the material. Do I really want to beat it again?

Coloured like a flame Sea through

I like the bizarre, flame-like shape the tapa has now. Held against the light we can appreciate how thin the bark is. It is firm and yet soft to the touch. What must it have been like to wear such bark as a garment?

Don't remove tapeEven the “dont-remove tape” has acquired new colours in all shades of the rainbow. The wash-away frame has become my favourite rusting tool. I wrap it with a new piece of cloth to have something to look forward to when I come back next time.
Re-wrapping the rusty frame

Tapa and rust (4)

Frozen banyan bast

I have taken a piece of banyan tapa out of the freezer to thaw. It was harvested and wrapped in ti leaves (Cordiline terminalis) when we did the tapa making workshop with the senior art students at Enuamanu School a year ago. Keeping some samples of bark was my ‘payment’ for filming the event. I have never frozen fresh bark and am all curious how the bark feels to the touch and how it will be to beat it.

Beaten banyan bastFreshly harvested bark is tough at first. I can see from the discolorations that it must be a piece that has been buried in the sea during last year’s experiments. I notice with the first beats that this bark is beautifully soft and requires much less strength to “crack open”, i.e. loosen the fibres. It means I got to be careful not to beat too hard so as not to produce holes right away. My intention is just to beat it a little bit and then take it down to Ava Tapu beach to affix it to a part of the Edna. Having this amazingly soft piece of banyan on my tutunga (wooden anvil) carries me away and I go on until it is nearly finished.

Beating folded banyan bastI try out a new technique of folding the bark length-wise so that I end up with beating a parcel of fibres. I would love to beat it thinner, but stop right here. I might moisten it again and beat it some more after it has been in contact with Edna.

Tapa project Enuamanu School 2013It amazes me to return the bark to this same beach under whose coral boulders it had been buried last year. Little idea did I have then of the journey this tapa would undertake. Bringing it back to the Edna now is only the beginning of a new phase…

Uncovered rusty frameWe have just uncovered the “wash-away frame”. It will be a wonderful piece of the Edna to do its magic with this tapa piece. I wrap my “don’t remove tape” around the frame as well to secure the tapa as best I can.

Tapa already black

Tapa-wrapped frame hung high

I can’t believe my eyes when the colouration is almost instant at the contact with the salt-water-soaked tapa. This time I place it high up on Edna’s bow, wedging it into a hole and hoping that the sea won’t steal it. Will it be there tomorrow? What will it look like then?

The wash-away frame

Rusty frame

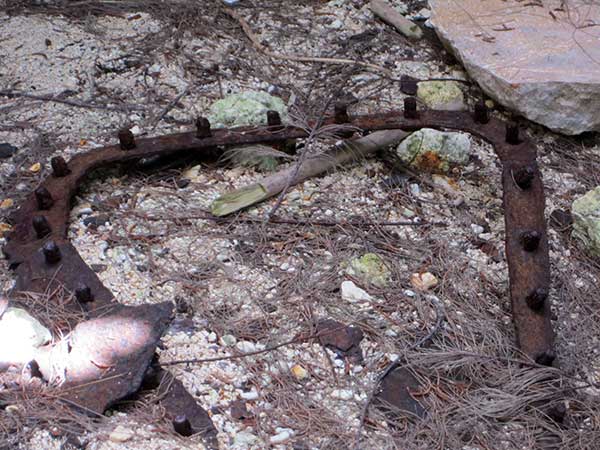
In search for rusty bits and pieces that will help me dye fabrics, I wander into the bow of the Edna. She welcomes and rewards me instantly. I find this amazing frame with protruding screws on both sides that promise me regular rusty dots – my inner eye can just see them…

I drag the frame to the front where I have placed the collections of “fabrics of the day” and some lengths of builders line. There is better light here and some coral boulders that serve me as work tables and chairs. Soon the frame is safely wrapped with salt-water-soaked cotton fabric and bound tightly.

Wrapped frameThe sea has been calm. I decide to place the frame in front of Edna’s bow, high up on the beach in the sand in order to let the frame’s weight add some extra pressure to the fabric for better marking.

When I return the next day, I am shocked. According to my time calculations it should be low tide and the sea calm. Instead high waves are still breaking on the bottom of Ava Tapu beach and – my precious frame has disappeared! Disappointed I scan the beach area.

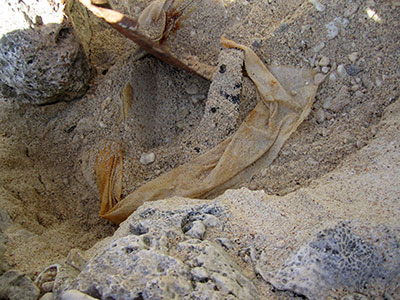
Buried fabricEventually I find a small cloth surface that protrudes through the pieces of coral and sand, buried between two heavy boulders right by the edge of the sea some ten meters or so away from where I had placed the wrapped frame. With a stick I try to dig it out but to no avail. I mark the area with my digging stick, just in case. I will have to return with a shovel. Normally I power-walk down to the beach which I will certainly not do with a shovel on my shoulder…!

Kareen, a new friend, arrives to stay with us for a week. I have seen on her blog that she is an excellent photographer. Kareen offers to help me with the digging so we take the car down to the beach.

Buried frameWhen I look for my mark it has – of course – disappeared. After some searching I glimpse a rusty fabric patch under a different boulder and the digging can begin in serious. Sand and water have sucked and pushed the wrapped frame deep under.


The two of us take turns in digging, scraping, pulling and photographing until we are finally rewarded with some movement. The frame’s sides have come unwrapped. Both have broken shorter.

Digging outThe fabric has acquired beautiful patterns of all shades from black to orange. The material seems intact with the exception of a few holes. Like sand-washed jeans, I think. If ever I want to ‘age’ fabric artificially, now I know what to do: bury it in the sand at Ava Tapu beach.

 
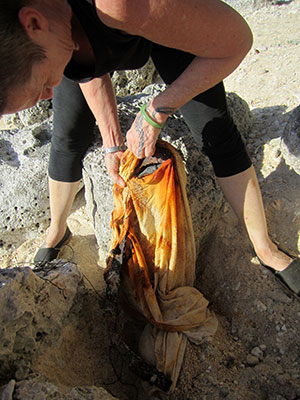
After some more digging we can grab at the fabric and pull, pull hard and – yay! Finally the sand releases the frame and its wrapping cloth.

Untying knotsUncovered fabric
I can’t wait to untie the knots to release the fabric. What a delight of colours!

Rusted wrapping clothIt is just the right light this late afternoon.

Washing out sandThe sand needs washing out.

Sun patterns on floating fabricThe sun paints patterns on the floating fabric.

Rust and reefIt is low tide, the sea and the sky are of a deep blue. Orange growth on the reef echoes the colours of Edna’s new cloth.

KareenRelaxing from the hard work we are happy about the result

Orange sunset All we want now is an orange sunset.